Author Archives: The Cooking spoon

Whole Spelt Pizza with Chorizo, caramelized Onions and Basil

Homemade Pizza is one of my favorite foods to cook at home , especially on my Pizza stone. If you bake a lot of Pizza’s at home it is worth buying a Pizza stone and a Pizza peel, it makes life so much easier. An other great method, which is what I used to do before I had all the Pizza baking equipement was, turning the baking tray in your oven upside down, it works great too, I do recommend placing the Pizza on a piece of baking parchment before popping it into the oven with this method so it doesn’t stick. When using a Pizza stone I find that the best non-stick method is to use semolina or polenta for underneath the Pizza when placing on the stone.

The spelt Pizza dough is really delicious and it has this nutty flavour that we love. The combination of the spicy Chorizo with the sweetness of the caramelized onions is pure heaven.

Makes : 3 large Pizzas or 4 smaller ones.

Ingredients:

400 gr / 2.5 cups whole grain spelt
100 gr / 3/4 cups white spelt
1 tsp instant yeast
1 tsp salt
1 tbsp olive oil
350 -375 ml / 1.5 – 1 3/4 cups warm water

1 onion, peeled and sliced
2 tsp olive oil
2 tsp honey
Salt and pepper

2 cups shredded Mozzarella

1 – 1 1/2 cup Marinara sauce
30-40 slices chorizo approx* SEE NOTE
Fresh basil

Instructions

If you are using a pizza stone, place it in the oven an hour before baking to heat up.

In the bowl of your stand mixer, combine flour, yeast and salt.
Turn on the mixer to slow and add warm water and olive oil. Add a little more water if it seems too dry or add a little more flour if it seems to wet.
Knead for 5 minutes.
Place in an oiled bowl and cover with cling film.
Let rise until double in bulk,  punch down and shape into ball again, place back in oiled bowl and cover.
Now place dough in fridge until ready to use.

To make the caramelized onions;
Heat a frying pan and add the olive oil,  add the sliced onions and cook for 5 minutes,  add the honey and cook until golden brown,  about 3 to 5 more minutes.  Remove from heat and set aside.


Remove the dough from refrigerator at least one hour before using.
Roll out the dough on a floured surface, I prefer to use semolina since this doesn’t stick to the baking stone.
Spread the Pizza base with marinara sauce, cover with a thin layer of the Mozzarella cheese then caramelized onions,  and then add some more cheese and divide the chorizo over the pizza. Lightly dust your pizza peel with semolina , gently lift the side of the Pizza and slide it under in one secure movement, transfer to oven. Alternatively, roll out on parchment paper and transfer to oven tray.
Bake at 230 for 10 to 12 minutes, turning the pizza half way. We like our Pizzas dark and crunchy but that is up to you.

*I always buy a whole Chorizo sausage and slice it myself, but do what works for you and depending on the size, you can use either more or less, these slices were small so we used 9 to ten slices on each Pizza.

Enjoy!

Steak au Poivre, Steak in a creamy green peppercorn sauce

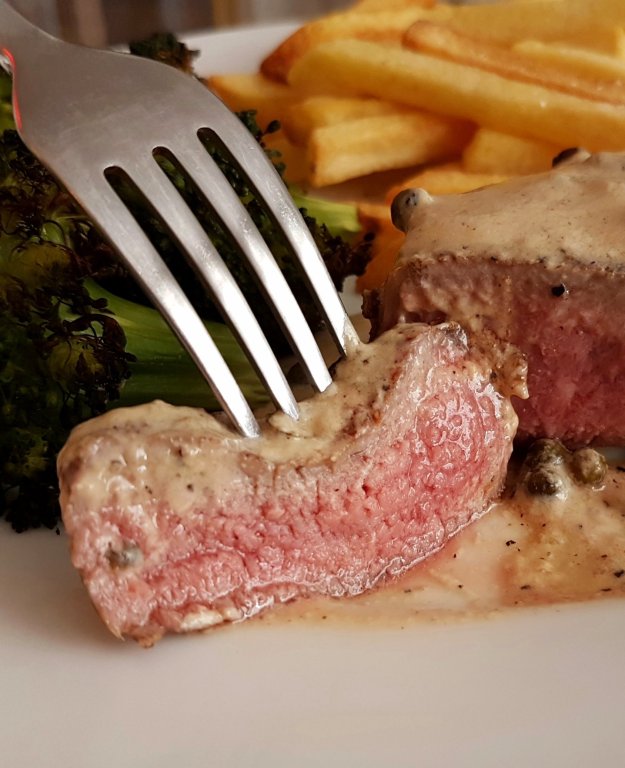
Steak au Poivre or,  Steak in a creamy green Peppercorn sauce is a classic recipe that is easy to make at home and everyone loves. My version however is alcohol free, making it suitable for all eaters.
You really don’t have to go to a fancy restaurant to eat Steak au Poivre.
The classic version uses cognac for the sauce but I’ve made this non alcoholic version and so far no one has even noticed.  The secret ingredient is the Worcestershire sauce,  it’s a great addition of flavor if you don’t want to use alcohol or simply don’t have a bottle of cognac or brandy sitting around in the house. 
Cooking Steak is a personal thing and most chefs have their own tricks, I like to sear the heck out of mine to get the most caramelized meat flavor and I add the butter half way thru cooking so it doesn’t burn, but we do want that buttery flavor. If you have a cast iron skillet,  use it.

INGREDIENTS:

• 4 x 250 gr/8.8 oz Steaks, about 3cm/1.2 ” thick (I used Rib-eye)
• 1 tbsp. Black peppercorns, crushed or freshly ground coarse black pepper
• Salt
• 3 tbsp. Butter, divided into three
• a little neutral flavored olive oil for rubbing the meat
• 4 tbsp green peppercorns in brine
• 240 ml/1 cup heavy cream
• 60 ml/1/4 cup beef stock
• 7.5 ml/1 1/2 tsp Worcestershire sauce
• a few dashes of Frank’s hot sauce or Tabasco

INSTRUCTIONS:

Take the Steaks out of the refrigerator 30 minutes before cooking,  so they can get to room temperature.
Crush the black peppercorns in a pestle and mortar until medium fine.
Pat the steaks dry and rub them all over with a little oil.
Season the steaks on both sides with the pepper and salt just before cooking.
Heat a (cast iron) skillet to piping hot.
Place the Steaks in the pan and don’t move them, after one minute turn them over and sear for one more minute.
Now sear the sides quickly, add one tablespoon of the butter, turn the heat to medium. Add another tablespoon of butter.
After two to three more minutes add the remaining butter, depending on how you want your steak doneadd the green peppercorns.  Remove the steaks to a (warm)* plate and cover with foil to rest while you finish the sauce.
Add the beef stock to the pan,  reduce by half and add the cream,  turning heat to low.
Add the hot sauce and Worcestershire sauce. Taste and adjust seasoning, adding more ground pepper if you like.  Place the steaks on a serving platter or individual plates and cover with some of the sauce.
I always serve the steaks with French fries for mopping up the green peppercorn sauce, it’s so delicious.
*The steaks in the photographs were cooked 3 minutes each side.
** Since I always serve steaks with oven fries, I put the plates on top of the oven to warm up a bit. Serve straight away with some vegetables or roasted Broccoli like in the pictures

Enjoy!

Chocolate Dulce de Leche mini Tarts

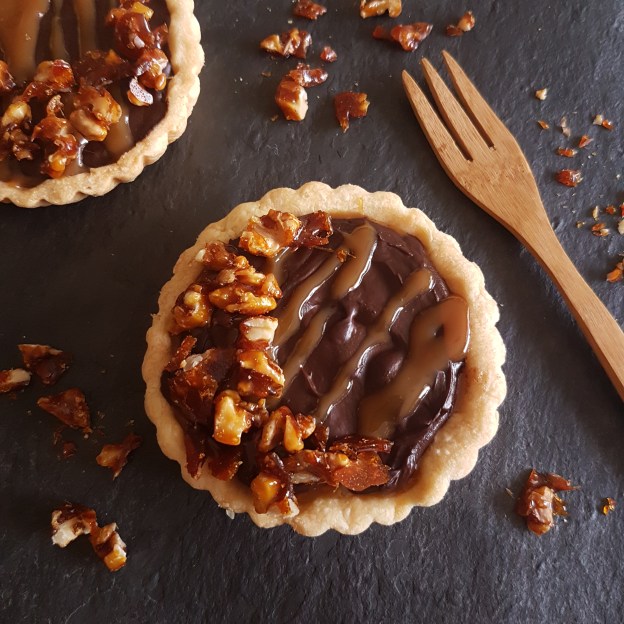
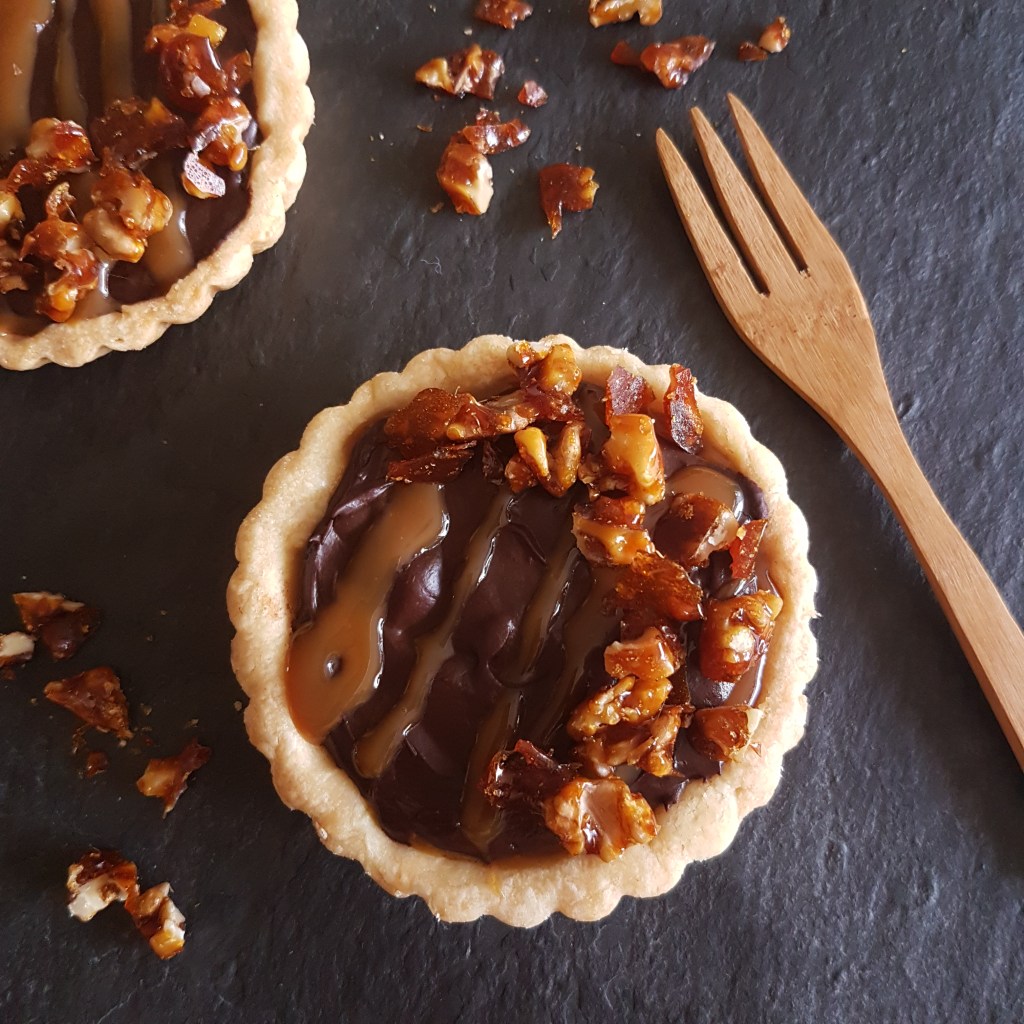
Mini tarts filled with dulce de leche and chocolate Ganache, some caramelized nuts add a bit of crunch making this little dessert fit for a king. So simple to make and yet very big on flavour. There’s just something so cute and fun about having your own little cake or in this case mini tart. Perfect with some coffee or tea in the afternoon or as a dessert.

The pastry crust is a no-brainer and you can find the recipe here. I like to make pastry dough when I have some time to kill and pop it in the freezer so that I can make a pie at a moments notice, you should try it, it’s a game-changer.

Makes 6 small tarts or one medium 20 cm / 8 inch

INGREDIENTS:

  • 1 recipe super simple pastry crust, prepared all the way.
  • 1/2 cup dark or semi sweet chocolate, chopped into pieces or chocolate chips
  • 1/2 cup double cream
  • 1/2 cup dulce de leche (use any leftovers for the most amazing fancy coffee with whipped cream)
  • 1/2 cup nuts of choice (pecans, hazelnuts or walnuts are good…)
  • 2 tablespoons sugar or maple syrup.

INSTRUCTIONS:

Start by making the crunchy nuts.

Heat a small frying pan on the stove to medium, toast the nuts stirring constantly for about 5 minutes util golden and toasted, add the sugar and do not stir any more. You can gently swirl the pan, as soon as the sugar has dissolved and coated the nuts pour them onto a piece of parchment paper and let them cool completely before chopping up.

Heat the double cream in a small sauce pan until small bubbles start to appear, remove from heat immediately. Add the chopped chocolate and let it melt for about 5 minutes, stir to combine.

Dived the dulce de leche over the tart shells, gently top with the chocolate ganache. Place the tarts in the refrigerator to firm up and ready to serve. Just before serving, chop up the nut brittle and sprinkle over the tarts.

Enjoy!

If you make this recipe please be sure to leave a comment and/or give this recipe a rating! I love hearing from you.  And please don’t forget to tag me on Instagram so I can see your creations!

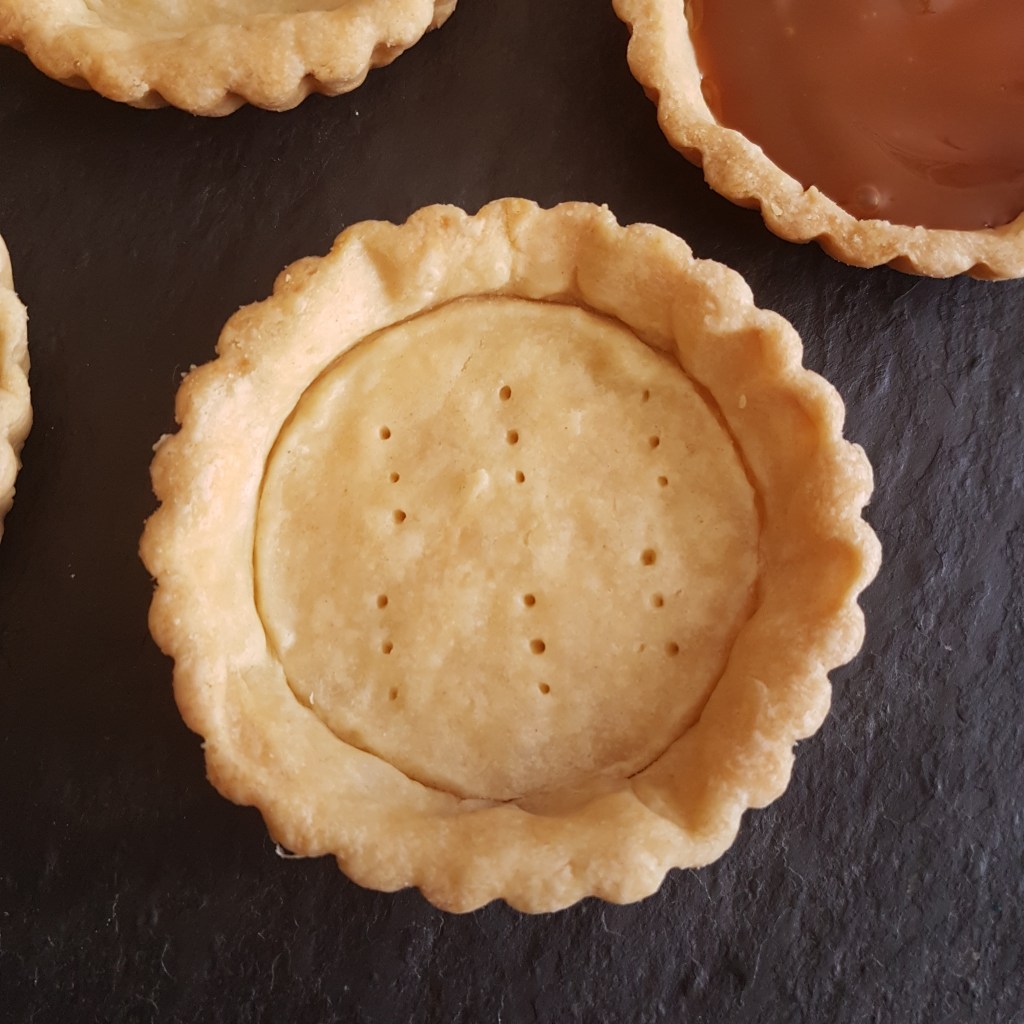
Super simple Pastry Dough

Super simple Pastry Dough!


And when I say simple, I mean really simple and pretty much fool proof and no fail. This flaky pastry dough keeps amazing in the fridge for a few days and also in the freezer for about a month. We always have some in the freezer.
Sometimes I prepare various tins filled with dough, pop them in the freezer so I can make a pie or mini tarts at a moments notice.
What I love about this recipe is that you can use it for both sweet or savoury pies.
The most important thing with pastry is that it has to be, and stay as cold as possible at all times until it goes into the oven. When using ice water use as little as possible, a high fat content is essential in the butter you use, 80% preferably. Cut the butter in small cubes and place it in the freezer for 5 minutes while you set up your food processor and get everything ready.
After that it’s five minutes work and your done.

Prep time : 10 min

Cooling time : 2 x 30 min

Cooking time : 20 min

Serves : 8

1 x 20cm/8in spring form tin or 8 small tins


INGREDIENTS:

– 200 gr / 7 oz. cold butter
– 300 gr / 10 1/2 oz all purpose flour
– a pinch of salt
– about two tablespoon of ice cold water (maybe three)

INSTRUCTIONS:

1. Fill a glas with ice cubes and add water.
2. Cut your butter into small cubes, place them in a bowl a place this in the freezer while you get out your flour and food processor.
Measure the flour and place in the bowl of the food processor. Add all the butter, divided evenly over the flour. You want to process as little as possible and as quickly as possible.
Add the pinch of salt.
Pulse the food processor a few times until the mixture resembles sand, add the ice water one tablespoon at a time. Pulse again. To test, grab some pastry between your fingers and press together, as soon as it holds , it’s ready. Tip out on to a work surface and shape into a ball. Wrap in cling film and place in the refrigerator for at least 30 minutes before shaping.
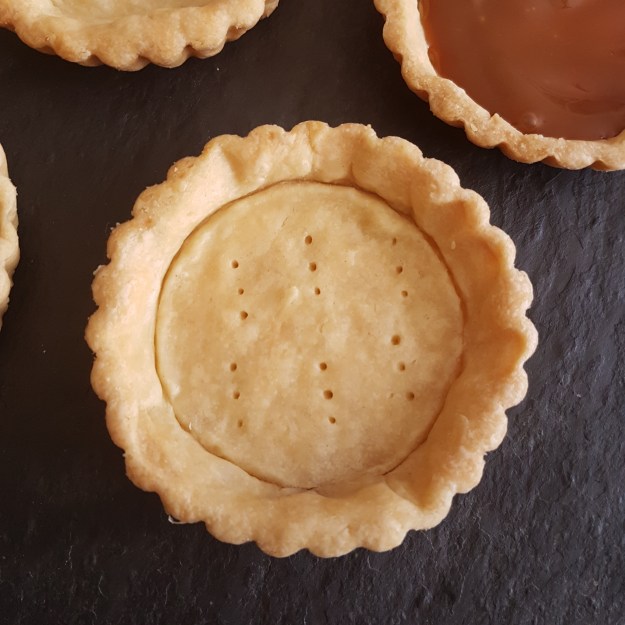
When ready to use, roll out the pastry to desired shape, place in tin that has been oiled slightly, pierce the pastry with a fork and place a piece of parchment paper on top. Add some baking beans. Return to the refrigerator for another 30 minutes to cool completely before baking.
Bake for 15 minutes, then remove the parchment paper and baking beans and bake for for 5 more minutes.
Now they are ready to be filled with your favourite filling, sweet or savoury.
Enjoy!