Category Archives: Baking

Strawberry Cheesecake mini Pies

Simple Strawberry Cheesecake mini Pies, are made with fresh strawberries, a quick cheesecake filling and brushed with a strawberry glaze. They come together in minutes and are so delicious.

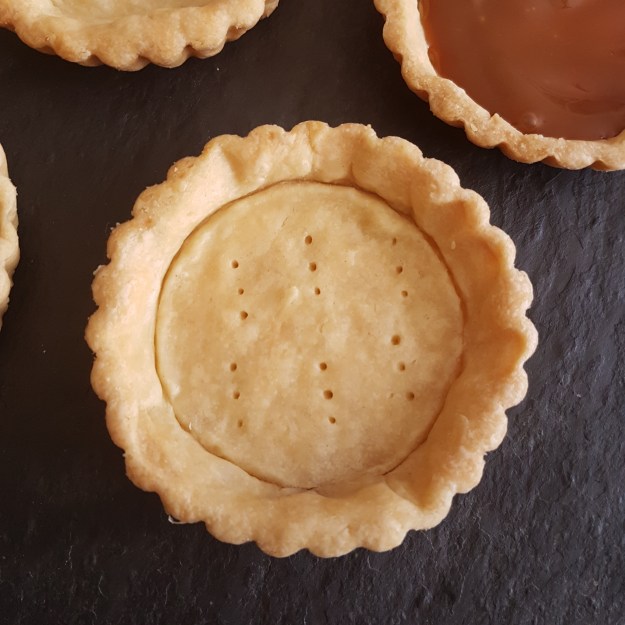
You only have to bake the Pastry shells and the rest is done in a jiffy. I have used my Super Simple Pastry dough recipe, so once the shells are baked and cooled you just spread some cheesecake filling on top and layer with fresh strawberries. The shells could be baked the day before and stored in an air-tight container.
Serve as a dessert, snack or at parties. These are always great!

The pastry crust is a no-brainer and you can find the recipe here.

Makes 6 small tarts or one medium 20 cm / 8 inch


INGREDIENTS:

1 recipe super simple pastry crust, prepared all the way.
3 cups fresh Strawberries
2 tubs of cream cheese (400 gr/ about 1 3/4 cups)
3 tbsp. of milk of choice for loosening up the cream cheese
50 grams/ 1/2 cup confectioners sugar
1/2 tsp vanilla extract
3 tbsp strawberry jam diluted with water for drizzling on top, or honey.

INSTRUCTIONS:

Remove the crown from the Strawberries and cut them in half.
Place the cream cheese in a bowl and beat until soft, adding the milk to get to process started, add the vanilla extract and the confectioners sugar. Beat until combined and fluffy.
Spread 1/6th of the cream cheese filling in each mini pie, place some strawberries on top.
Mix the strawberry jam with a tablespoon or two of water and drizzle the glaze over the strawberries. You could also drizzle with some honey instead. Assemble the mini pies close to serving time, since the pastry shells might soften if you leave them filled overnight. Serve with whipped cream (optional).

Enjoy!

If you make this recipe please be sure to leave a comment and/or give this recipe a rating! I love hearing from you.  And please don’t forget to tag me on Instagram so I can see your creations!

Quick Quiche with Ham, Broccoli, caramelized Onions and Basil

Quiche ham broccoli

This recipe for a super quick and easy Quiche is one of those recipes you’ll make time and time again.  I love a good fool-proof recipe that you can have on the table in 30 minutes or less.  Add a salad and voila, dinner is served.
I have made this Quiche with pre rolled ready made Puff pastry, which I consider a freezer/pantry essential. So this really comes together in no-time. You can vary the ingredients according to what you have (leftover) in your fridge too, should you not have ham or Broccoli.  Think seafood, meat, poultry, veggies,  cold cuts, you name it. In fact it’s a great way to use up your leftovers.  But for now, this is one of our favourite combos. Try it, you’ll see why.

INGREDIENTS:

1 Sheet ready made puff pastry
2 cups broccoli florets
4 oz/ 100 gr. cooked ham
4 oz./100 gr. grated cheese
2 medium onions
Some olive oil or butter
2 tsp. honey
Salt and pepper
A handful of fresh Basil
1 cup light cream
4 eggs

Quiche ham broccoli

INSTRUCTIONS:

Begin by defrosting your puff pastry if it is frozen.
Pre heat oven to 180C/350F.
Next, peel the onions, slice in half and cut into half rings.
Heat a frying pan to medium heat, add the butter or oil.  Add the onions and cook for 5 minutes,  add the honey and cook for a few more minutes or until golden brown.  Remove from heat and set aside.
Meanwhile cut broccoli into florets and steam in microwave for 3 minutes or in a pan of boiling water,  make sure to drain very well after so that there is no extra water.
Cut ham into cubes,or slice thinly.
Line a baking tin, about 8×8 inch/ 20×20 cm or 9×9 inch/22x22cm. with parchment paper.
Place the puff pastry in the tin making sure you go up the sides as well.
Divide onions, ham, broccoli and basil (reserve some for decorating) over the crust.
In a bowl beat the eggs with the cream, season generously and pour over the filling. Sprinkle  the cheese over the top. 
Bake in the middle of the oven for 30 -35 minutes or until set when you tap the side of the tin. It should wiggle just a tiny bit in the middle.
Serve immediately.
Enjoy!

If you make this recipe please be sure to leave a comment and/or give this recipe a rating! I love hearing from you.  And please don’t forget to tag me on Instagram so I can see your creations!

Oven baked Falafel with Dates and Pine nuts

Weekends call for easy food, and since it’s almost Friday aka movie night, I like to keep it simple, snack-like food that you can eat with your hands like Soft Tacos, Burgers or Pizza. Either way this recipe ticks all the boxes. You can make the Falafel in the morning and assemble the Pita’s in the evening when you’re ready to stream that movie.
These Falafels are baked in the oven, so virtually fat free, and super simple, also I have added some chopped dates for a little sweetness and toasted pine nuts for extra flavour.

INGREDIENTS FALAFEL;
• 1 small red onion, peeled and chopped fine
• 2 cloves of garlic, peeled and grated
• 6 dates, stone removed and chopped
• 3 tbsp. Buckwheat flour or oat flour
• 3 tbsp. Almond flour
• 2 tbsp. nutritional Yeast (optional)
• 1 1/2 tsp. Garam Masala
• small handful fresh Coriander
• 1 tsp. Himalayan sea Salt
• 3 tbsp. Coconut oil
• 1 egg

• 3 cups cooked chickpeas

Pitas for serving, toppings like tomato slices, cooked beet slices, lettuce etc…

Sauce;
• 1/4 cup Aïoli
• 3/4 cup plain yoghurt
• 1/2 garlic, peeled and grated
• 1 tbsp. pomegranate Arils
• 1 tsp. olive oil

METHOD;
Toast pine nuts briefly for 3 minutes in a dry pan, set aside.
In a food processor add all the ingredients for the Falafel, except the chickpeas and pine nuts.
Pulse a few times and now add the chickpeas. Again pulse a few time, scrap down with a spatula, and pulse a gain. It should be mushy but with bite and a few chunks left for texture. Now mix in the pine nuts with your spatula. Transfer to a bowl.
Meanwhile heat the oven to 220° C / 428° F
Make little ping-pong ball sized balls with slightly wet hands.
Layer them out over a baking tray that has been lined with parchment paper.
Spray generously with olive oil and bake for 20 to 25 minutes, turning them over very carefully half way.
Make the sauce by stirring the ingredients together and sprinkle the pomegranate arils over the yogurt sauce, pour over a teaspoon of good olive oil.
Toast pita bread, split open and spread some dipping sauce over it. Stuff with lettuce and some veggeis and eat straight away.

Enjoy!

Chocolate Dulce de Leche mini Tarts

Mini tarts filled with dulce de leche and chocolate Ganache, some caramelized nuts add a bit of crunch making this little dessert fit for a king. So simple to make and yet very big on flavour. There’s just something so cute and fun about having your own little cake or in this case mini tart. Perfect with some coffee or tea in the afternoon or as a dessert.

The pastry crust is a no-brainer and you can find the recipe here. I like to make pastry dough when I have some time to kill and pop it in the freezer so that I can make a pie at a moments notice, you should try it, it’s a game-changer.

Makes 6 small tarts or one medium 20 cm / 8 inch

INGREDIENTS:

  • 1 recipe super simple pastry crust, prepared all the way.
  • 1/2 cup dark or semi sweet chocolate, chopped into pieces or chocolate chips
  • 1/2 cup double cream
  • 1/2 cup dulce de leche (use any leftovers for the most amazing fancy coffee with whipped cream)
  • 1/2 cup nuts of choice (pecans, hazelnuts or walnuts are good…)
  • 2 tablespoons sugar or maple syrup.

INSTRUCTIONS:

Start by making the crunchy nuts.

Heat a small frying pan on the stove to medium, toast the nuts stirring constantly for about 5 minutes util golden and toasted, add the sugar and do not stir any more. You can gently swirl the pan, as soon as the sugar has dissolved and coated the nuts pour them onto a piece of parchment paper and let them cool completely before chopping up.

Heat the double cream in a small sauce pan until small bubbles start to appear, remove from heat immediately. Add the chopped chocolate and let it melt for about 5 minutes, stir to combine.

Dived the dulce de leche over the tart shells, gently top with the chocolate ganache. Place the tarts in the refrigerator to firm up and ready to serve. Just before serving, chop up the nut brittle and sprinkle over the tarts.

Enjoy!

If you make this recipe please be sure to leave a comment and/or give this recipe a rating! I love hearing from you.  And please don’t forget to tag me on Instagram so I can see your creations!