
Serves 4.
Well that’s a mouth full. I just had to make sure you realized how good this dish is, straight away with just reading the title.
This meal has a few steps. Either make or buy in addition to the Chicken skewers;
-Ras el Hanout
-Flatbread
-Tomato Hummus
-Garlic Dill Yoghurt dip
-Salad greens.
You start of by making Ras el Hanout so you can marinate the chicken first. You can use store bought off course, but home made is so much more fun. And it gives you such a great kick making your own spice blends. Store blends tend to be too salty and you can also adjust the taste to your liking when you make your own.
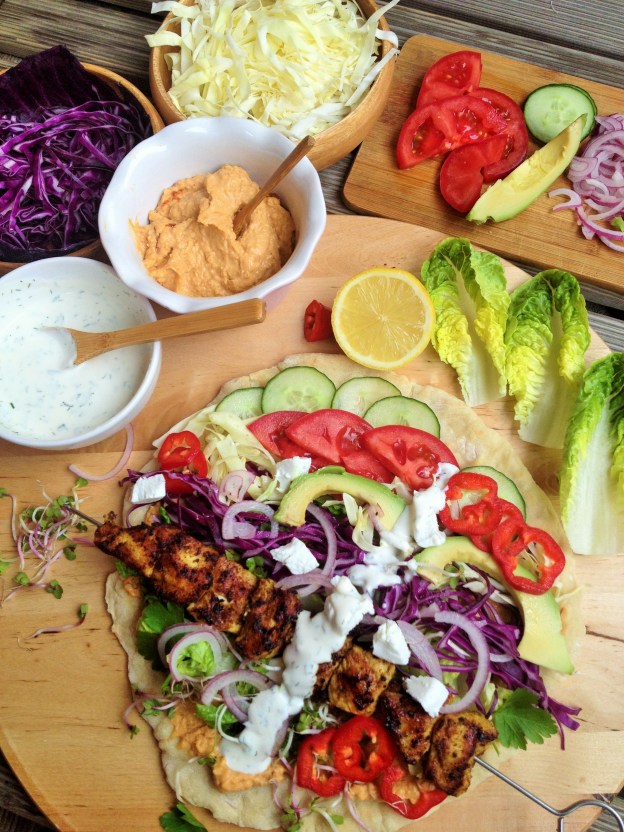
Then there is the Flatbread, I was going to make it from scratch when I realized I still had Focaccia dough in the freezer. And I thought I’d give it that a try, why not.
Well it worked perfectly, I just roll it out thin, fried it in a dry pan for 3 to 4 minutes on each side and Voilà….Flatbread. How great is that!

I served it with some delicious Sun dried Tomato Hummus to spread all over the Flatbread before filling.
Ingredients;
4 Chicken breasts cut into medium chunks
2 garlic cloves, peeled and grated
Salt and pepper
1/4 C. olive oil or sunflower oil
juice of half a large lemon
1 tbsp. Ras el Hanout (about half the spice recipe)
4 Flat breads, store bought or home made. See Potato Focaccia
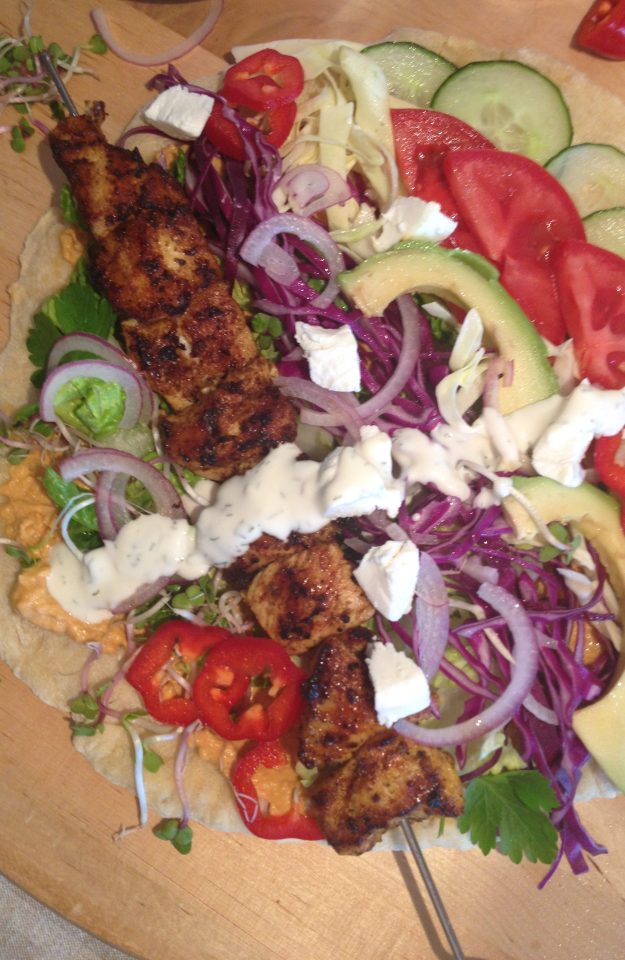
Sun dried Tomato Hummus
Garlic and Dill Yoghurt Dip
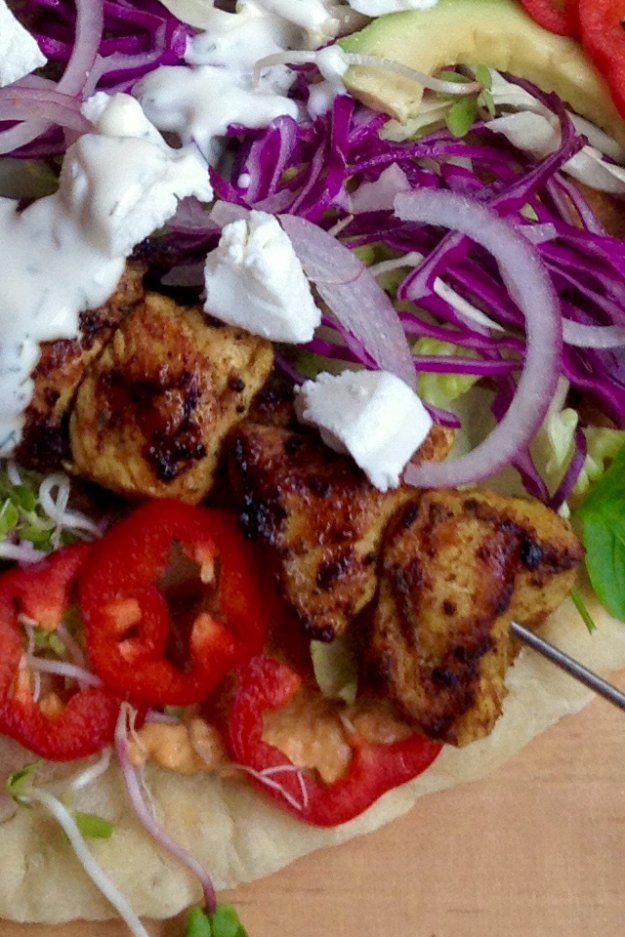
Fresh soft cheese like Feta or Goat cheese
Lettuce, Tomatoes, red Cabbage, white Cabbage, Cucumber, thinly sliced red onion, Avocado, red bell Pepper etc…. for serving
For the Ras el Hanout (enough for 2 times)
2 tsp. ground cumin
1 tsp. ground black pepper
1 tsp. turmeric
1 tsp. coriander
1/2 tsp. cinnamon
1/2 tsp. ground cloves
1/2 tsp. ground ginger
1/2 tsp. ground cardamom
a dash of Cayenne pepper
Sun dried Tomato Hummus
¼ cup lemon juice
¼ cup tahini
2 tablespoons olive oil
¼ cup sundried tomatoes*, chopped roughly
1 clove garlic, peeled and grated
½ teaspoon ground cumin
½ teaspoon Himalayan salt
1 (15-ounce) can chickpeas, drained and rinsed
Method
Put all the ingredients in a blender and process until smooth. Add a little water if it is too thick .
Pour into a serving bowl and drizzle with additional olive oil and top with more sun dried tomatoes.
Keeps in an airtight container for up to one week in the refrigerator.

Garlic Dill Yoghurt Dip
1.5 C. thick Greek Yoghurt
2 tbsp. fresh chopped Dill
a squeeze of lemon juice
1 tablespoons olive oil
1 clove garlic, peeled and grated
a good pinch Himalayan salt
Method
Put all the ingredients in a little bowl and mix.
Chicken Skewers
For the Skewers, first get a bowl and put the chicken chunks in there, add the 2 garlic cloves, 1/4 C. olive oil, the juice of half a large lemon, 1 tbsp. of Ras el Hanout and season generously with salt and pepper. Mix well.
Leave to marinate for an hour at least, but preferably for 4 to 5 hours.
When ready to grill, remove Chicken from the fridge about 30 minutes before grilling. Skewer the chicken. Oil a griddle pan lightly and grill the chicken on medium high heat for about 4 to 5 minutes on each side.
To serve spread hummus over the flatbread, top with vegetables of choice put one or two skewers on top and serve with Garlic Dill dip. Sprinkle over some pieces of fresh soft cheese.
Enjoy

Looking for more great recipes to try? Be sure to check out this Chicken Mango Avocado Enchiladas