Author Archives: The Cooking spoon

5 minute Romesco Sauce, cheats version

Romesco Sauce is a Spanish pepper and tomato based sauce from the region of Cataluña, that dates back to the 15 th century, thanks to Christopher Columbus who brought back the Romesco peppers from his travels in the America’s which are the base for this sauce.
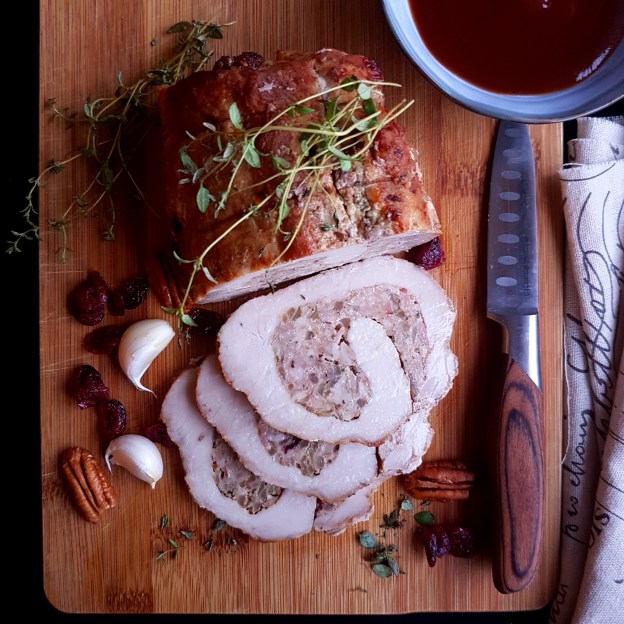
You can find Romesco sauce everywhere in Spain, it’s very popular and can be eaten with everything from just bread to grilled fish, grilled meat or vegetables.

The original version is with dried peppers, almonds, some times hazelnuts as well, bread, garlic etc…
I have come up with a cheats version that can be done in 5 minutes and it is addictively delicious.

INGREDIENTS:

6 tbsp. Olive oil
1 small onion, peeled and chopped fine
2 garlic cloves, peeled and chopped
1 jar roasted red bell peppers (15 oz. jar / 500 ml), drained
1/4 cup almond butter (the roasted kind)
1/3 cup sun dried tomatoes in olive oil
1/3 cup parsley, roughly a handful
1-2 tsp. red wine vinegar
3/4 tsp. salt
fresh black pepper
1 tsp. smoked paprika (preferably the Spanish kind)

INSTRUCTIONS:

Place the sun dried tomatoes in a bowl and cover with very hot water. Let sit for five minutes then drain.
On medium heat, fry onion and garlic in two tablespoons of oil, until light golden and just soft. Let cool a bit.

In a food processor, add the pepper, the onions and garlic, almond butter, drained sun dried tomatoes, parsley, vinegar, salt, pepper, paprika and the remaining 4 tablespoons of olive oil.
Turn on the food processor and blend until smooth. That’s it!

I use only one teaspoon of vinegar but you can add more depending on how acidic you like it.

The sauce will keep in the refrigerator for about five days in a glass container or jar, but I can assure you, you will be putting it on everything.

Enjoy!

Vegan Chocolate Zucchini Banana Bread, gluten free

This vegan chocolate zucchini bread is a game-changer. It’s perfectly sweet, and dare I say itmoist (ughh, I just can’t with this word) and has a rich chocolate flavor. It’s soft and bouncy, tender and just everything you want from a banana bread.

Morning, noon or as a dessert, it’s always good and just perfectly delicious.

I wanted to create a Vegan Chocolate Zucchini Banana bread that would have all the characteristics of a regular Banana bread, but without is either falling apart or being too dense, which can be a challenge since it is gluten-free too. Guess what?…nailed itLOL.

The trick is the combo of flax flour and Psyllium husk powder, it’s like magic. I use in my gluten-free breads too and honestly, it works every time. A great plus about this recipe is that you can skip squeezing out the zucchini altogether, there’s no point in removing liquid first and then adding it back in later. Also, a waste of perfectly healthy zucchini “juice”.

For this recipe I created my own gluten-free flour blend and I haven’t tested it with any other ready-made GF blend, but I imagine it would work too. You may need to add a little more or less liquid, depending on the flour you use. As for the chocolate chips, (I feel like I’m confessing to a crimebut) I didn’t use any, I opted for cocoa nibs instead but feel free to throw in a handful of real chocolate chips if that’s your game.

GLUTEN FREE FLOUR BLEND*:

  • 1/2 cup Corn flour (not starch)
  • 1/2 cup brown rice flour
  • 1/2 cup oat flour
  • 1/2 cup tapioca four
  • 1/2 cup corn starch

INGREDIENTS:

  • 1 1/2 cup grated zucchini (280 gr. / 10 oz. ) about 1 medium/large
  • 1 cup bananas mashed, about 2 large or 3 medium
  • 1/3 cup unsweetened apple sauce
  • 1/3 cup olive oil
  • 2 tsp. vanilla
  • 1/3 cup rice syrup
  • 1 tsp. plain vinegar
  • 2 cups gluten free flour blend
  • 1/3 cup cocoa
  • 3 tsp. baking powder
  • 1 tsp. baking soda
  • 2 tsp. psyllium husk powder
  • 2 tsp. flax flour
  • 1/3 cup cocoa nibs or 1/2 cup vegan chocolate chips.

INSTRUCTIONS:

Pre-heat the oven to 180C/350F. Line a buttered loaf tin 22 cm/9″ with parchment paper.

Start by grating the zucchini with a medium grater into a large bowl. Set aside for a minute.

In a blender add bananas, apple sauce, olive oil, vanilla, syrup and vinegar, blend until smooth.

Pour over the zucchini and mix thoroughly so that you don’t get zucchini clumps.

In another bowl mix the flour with the (sifted) cocoa, baking powder, baking soda, flax flour and psyllium husk powder. Mix by stirring with a whisk.

Now add the wet ingredients to the dry ingredients. Use a spatula to combine without over mixing.

Sprinkle in the cocoa nibs or chocolate chips and mix gently into the batter.

Pour batter into prepared loaf tin, smooth out the top of the batter with a small spatula and place in the middle of the oven.

Bake for about 60 minutes, insert wooden skewer to check, if it comes out dry it’s done.

Remove from oven and let cool on a rack for about 10 minutes. Remove from loaf tin, leaving on the parchment paper and let cool completely before cutting.

This loaf will keep for 3 to 4 days, or you can slice and freeze individual portions.

Enjoy!

NOTES :

*you will have a little flour left over. Alternatively make a double batch and use for gluten free pancakes or any other baked goods.

** You don’t need extra liquid in this recipe, the zucchini, apple sauce and oil are enough.

Spelt Soda Bread, dairy free

Soda Bread, dairy free.1

I’m going to hop right in to this….this Soda Bread is my favorite quick bread yet. It’s so fast that I won’t be buying bread for a long time. I can decide to make bread and 45 minutes later be eating it for lunch, we just love it.

The best thing about this Dairy free Soda Bread recipe is…..yes, you guessed it….it’s that it’s dairy free. So you don’t need to have buttermilk in the fridge.

Personally, I don’t enjoy the density that results of the use of dairy in a soda bread, it’s just too heavy for my taste, that’s why I came up with this version.

As you can see in the recipe below, it honestly couldn’t be simpler. Flour, baking soda, baking powder, salt a touch of honey and some plain vinegar to get the baking soda going, that’s it. Don’t let the vinegar scare you off, because it is just a little bit to replace the acidity from the buttermilk in conventional recipes. And you do not taste it at all.
I’ve been baking this Spelt Soda Bread every day for the last few months and my family absolutely loves it.

I use organic Spelt flour, so super healthy and absolutely no additives!

Give it a try, you’ll see what I mean. And I would love to hear your comments.
This loaf will keep for 2 days at room temperature but is best eaten the same day. It does freeze well. Freeze in a zip lock bag and take out slices as you need them.

This is a small loaf and will serve 3 to 4 people
Prep time is 10-15 minutes
Cooking time is 30 minutes

Soda Bread, dairy free.4

INGREDIENTS:

1 1/2 cups / 170 gr. whole grain Spelt flour
2 cups / 240 gr. white Spelt flour
1 tsp. / 5 gr. baking soda
1/2 tsp./ 2.5 gr. baking powder
1/2 tsp./2.5 gr. salt (for kosher salt you might need a little more)
2 tsp./ 10 ml. of honey
2 tsp./ 10 ml.  apple cider vinegar, or white vinegar
1 1/8 cups. / 270ml. cup hand warm water

INSTRUCTIONS:

Pre heat oven to 400 F / 200 C, with baking tray in the middle position of the oven.
Mix all the dry ingredients in a bowl. Gently mix together until well combined (I always use a whisk)
In a jug mix honey with water and vinegar and stir to combine.
Don’t mix bread until your oven is hot. This because baking soda only works for about 30 minutes, we need all the leavening action we can get so wait until oven is hot!
Then add water/honey/vinegar mixture to flour mixture and stir to combine. Quickly shape into a ball, adding a little extra flour if you need it. Place on parchment paper and make a cut or two in the ball of dough. Quickly place in the oven and bake for 30 minutes.
The loaf should sound hollow when tapped on, also pierce with a wooden skewer all the way through to make sure loaf is thoroughly cooked.
A great little tip is to place a small (oven safe) bowl with hot water in the back of the oven, moisture will help rise the dough and I actually do this with all my breads. I hope you love this loaf as much as we do.

Enjoy!

Soda Bread, dairy free.1

A Spelt Soda Bread to remember!

Pecan Cranberry stuffed Pork Roast

Pecan Cranberry stuffed Pork Roast is the best to feed a crowd.

If you’re on a budget or if you don’t have a lot of people coming over this Christmas, or for whatever reason (still a lot of restrictions in Europe) a roast Pork is a great idea!

This delicious roast pork is stuffed with sausage meat, onions, pecans and cranberries, all of those wonderful Christmas flavors, so you can imagine how thrilled I am about this easy roast. And also, this way you won’t be stuck with a wheelbarrow of leftover turkey, maybe just enough for a sandwich the next day.

You can serve this with mashed potatoes or roast potatoes and lots of different roast vegetables. Or if you want a super quick side dish you could make polenta, which might even be the best choice, with some butter and parmesan.

INGREDIENTS:

Serves 4 to 6

  • 1/2 cup pecan halves, chopped
  • 1 medium onion, peeled and chopped
  • 1 clove garlic, peeled
  • 1/4 cup dried cranberries
  • 1 cup fresh sausage meat, half a pound roughly (Casings removed)
  • 1 tsp. dry sage
  • 1/2 tsp. all spice
  • 1 Pork loin, 2 1/2-3 lbs.
  • a good drizzle of olive oil

For tray and gravy

  • 1 onion
  • 2 carrots
  • 2 celery stalks
  • a few sage leafs
  • a few sprigs of thyme
  • one glass of red wine or port
  • one tablespoon flour
  • 1 cup stock

INSTRUCTIONS:

  1. Fry onion in olive oil over medium heat, add garlic after two minutes and cook gently until golden.
  2. Add dry sage and allspice, give it a stir and remove from the heat, let cool completely.
  3. Cut pork loin open to form a blanket or ask your butcher to do this.
  4. Spread the pork loin out on a cutting board and season generously with salt and pepper, on both sides.
  5. Mix onion-spice mixture with sausage meat, pecans and cranberries. Spread over pork leaving a one inch/2.5cm strip uncovered on the outer end (away from you). Roll up the pork carefully and tie with butcher’s string. If you have difficulty tying, use small pieces of string that fit around once and tie to make a knot. Use 4 to 5 pieces of string, it doesn’t matter as long as it holds together, we will remove the string before serving anyway.
  6. Heat oven to 200 C/400 F
  7. Place pork on a bed of onion, carrots, Celery and herbs. Drizzle with olive oil
  8. Bake for 30 min. Reduce temp to 180 C/350 F and cook for another 45 min. Depending on size or meat. It’s 30 minutes per pound.
  9. For the gravy, remove pork from tray to let rest for 5 to ten minutes, covered lightly with aluminum foil. Remove the strings before serving.
  10. Place tray on the hob on medium heat and scrape the bottom of the pan, add one glass of red wine, or port. Stirring all the time, add a tablespoon of flour and stir it to combine well. Now slowly add chicken or beef stock until desired consistency. Let cook for a few minutes and strain into a sauce boat.
  11. Serve sliced with gravy and your favorite vegetables and potatoes. Enjoy!