Tag Archives: bread

Spelt Baguette

Making bread at home can be daunting, but what if I were to tell you that I truly believe anyone can do it 

Especially this recipe, it’s a” throw it together and forget about it” kind of recipe.

Almost that is, you do have to mix and knead a little bit.

Let me elaborate, you place all the ingredients in a bowl, knead for a few minutes, by hand or mixer. Then you cover the bowl tightly and put it in the refrigerator for 10 to 12 hours.

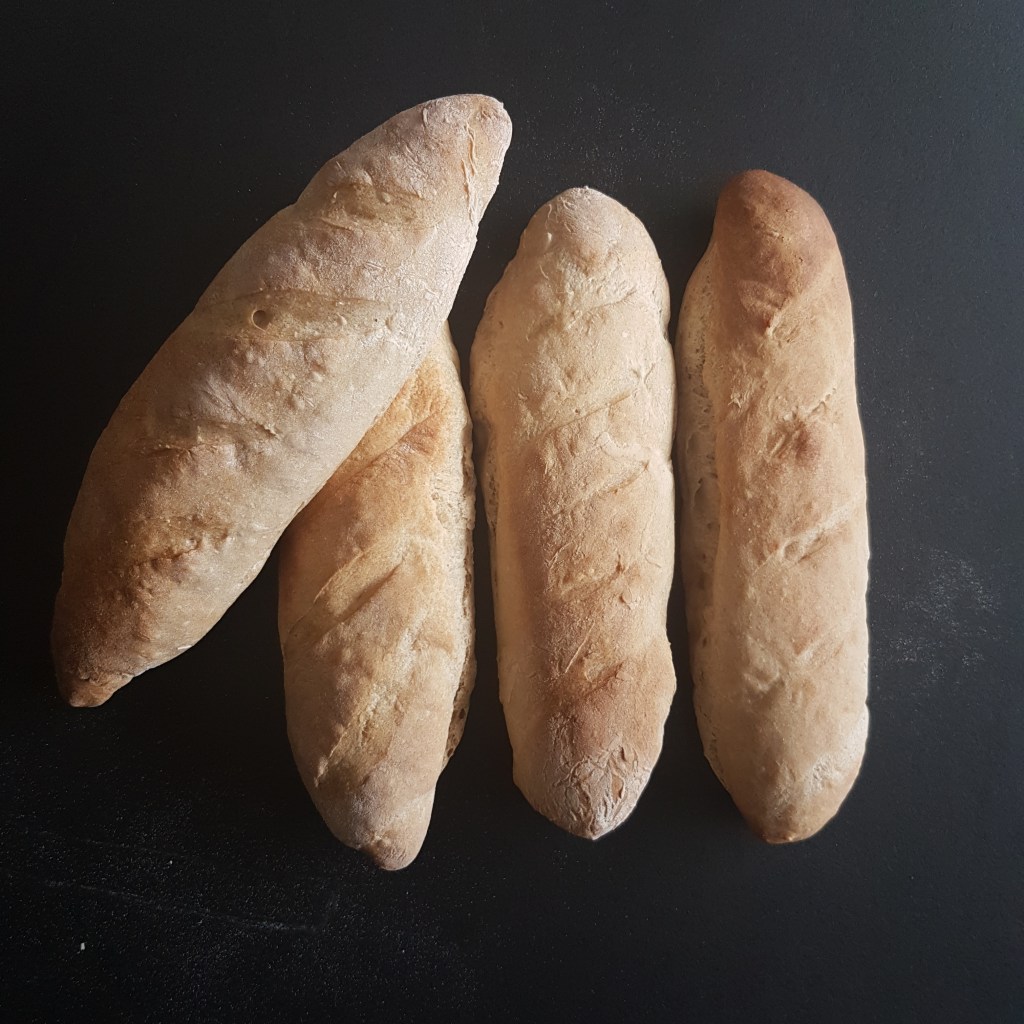
The next morning, you knead again for a minute or two, shape into four or six baguettes and cover for half an hour, then bake. It’s that simple.

The aroma of freshly baked Spelt baguette in the morning is like nothing else, you might think you’re in Paris! Just add a café au lait, and you’re good to go.

INGREDIENTS:
500 gr Spelt flour
350 ml water, hand warm
2 gr yeast
6 gr salt

INSTRUCTIONS:
Place all the ingredients in a large bowl and mix by hand or use a mixer with hook attachment.  Knead dough for 5 minutes and cover bowl tightly.

Place in refrigerator for 10 to 12 hours or overnight. Can also be made early in the morning for an evening bake.

After the resting period in the refrigerator, take the dough out of the bowl and place on a floured surface. Knead for two minutes and shape into four or six Spelt baguettes. Rolling the dough tightly, so you squeeze out all the air.

Place the baguettes on a parchment lined baking sheet and score the Spelt baguettes with a sharp knife. Cover with a tea towel and let rise for 30 minutes.

Pre-heat your oven at this point to 240 C / 460 F, place a small ovenproof container filled with hot water in the back of the oven. Place the Spelt baguettes in the middle of the oven and bake. For 4 baguettes it is 17 minutes approximately, for 6 smaller baguettes 15 minutes approximately.  You may have to turn the tray halfway baking depending on how good your oven is.

Remove from oven and let cool on a rack.
When tapped, the bread should sound hollow.

My favourite way to eat fresh baguette is with French country butter, preferably salted and strawberry jam. Enjoy!

Advertisement

Spelt Soda Bread, dairy free

Soda Bread, dairy free.1

I’m going to hop right in to this….this Soda Bread is my favorite quick bread yet. It’s so fast that I won’t be buying bread for a long time. I can decide to make bread and 45 minutes later be eating it for lunch, we just love it.

The best thing about this Dairy free Soda Bread recipe is…..yes, you guessed it….it’s that it’s dairy free. So you don’t need to have buttermilk in the fridge.

Personally, I don’t enjoy the density that results of the use of dairy in a soda bread, it’s just too heavy for my taste, that’s why I came up with this version.

As you can see in the recipe below, it honestly couldn’t be simpler. Flour, baking soda, baking powder, salt a touch of honey and some plain vinegar to get the baking soda going, that’s it. Don’t let the vinegar scare you off, because it is just a little bit to replace the acidity from the buttermilk in conventional recipes. And you do not taste it at all.
I’ve been baking this Spelt Soda Bread every day for the last few months and my family absolutely loves it.

I use organic Spelt flour, so super healthy and absolutely no additives!

Give it a try, you’ll see what I mean. And I would love to hear your comments.
This loaf will keep for 2 days at room temperature but is best eaten the same day. It does freeze well. Freeze in a zip lock bag and take out slices as you need them.

This is a small loaf and will serve 3 to 4 people
Prep time is 10-15 minutes
Cooking time is 30 minutes

Soda Bread, dairy free.4

INGREDIENTS:

1 1/2 cups / 170 gr. whole grain Spelt flour
2 cups / 240 gr. white Spelt flour
1 tsp. / 5 gr. baking soda
1/2 tsp./ 2.5 gr. baking powder
1/2 tsp./2.5 gr. salt (for kosher salt you might need a little more)
2 tsp./ 10 ml. of honey
2 tsp./ 10 ml.  apple cider vinegar, or white vinegar
1 1/8 cups. / 270ml. cup hand warm water

INSTRUCTIONS:

Pre heat oven to 400 F / 200 C, with baking tray in the middle position of the oven.
Mix all the dry ingredients in a bowl. Gently mix together until well combined (I always use a whisk)
In a jug mix honey with water and vinegar and stir to combine.
Don’t mix bread until your oven is hot. This because baking soda only works for about 30 minutes, we need all the leavening action we can get so wait until oven is hot!
Then add water/honey/vinegar mixture to flour mixture and stir to combine. Quickly shape into a ball, adding a little extra flour if you need it. Place on parchment paper and make a cut or two in the ball of dough. Quickly place in the oven and bake for 30 minutes.
The loaf should sound hollow when tapped on, also pierce with a wooden skewer all the way through to make sure loaf is thoroughly cooked.
A great little tip is to place a small (oven safe) bowl with hot water in the back of the oven, moisture will help rise the dough and I actually do this with all my breads. I hope you love this loaf as much as we do.

Enjoy!

Soda Bread, dairy free.1

A Spelt Soda Bread to remember!

Gluten-free Yeast-free Bread

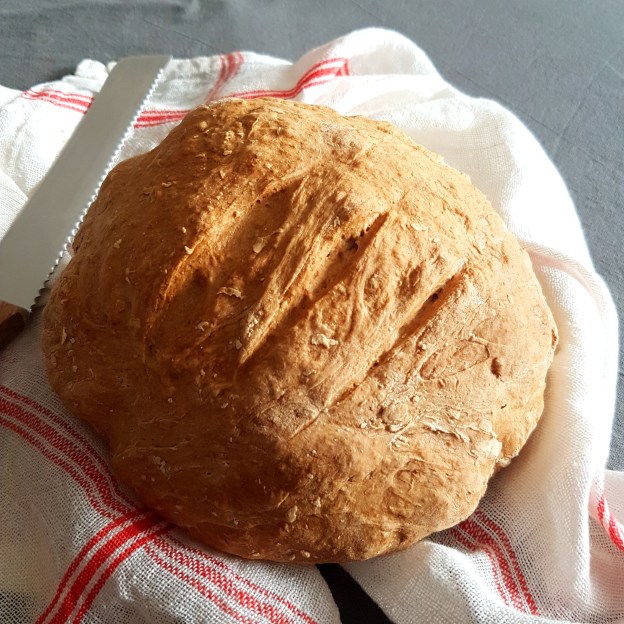
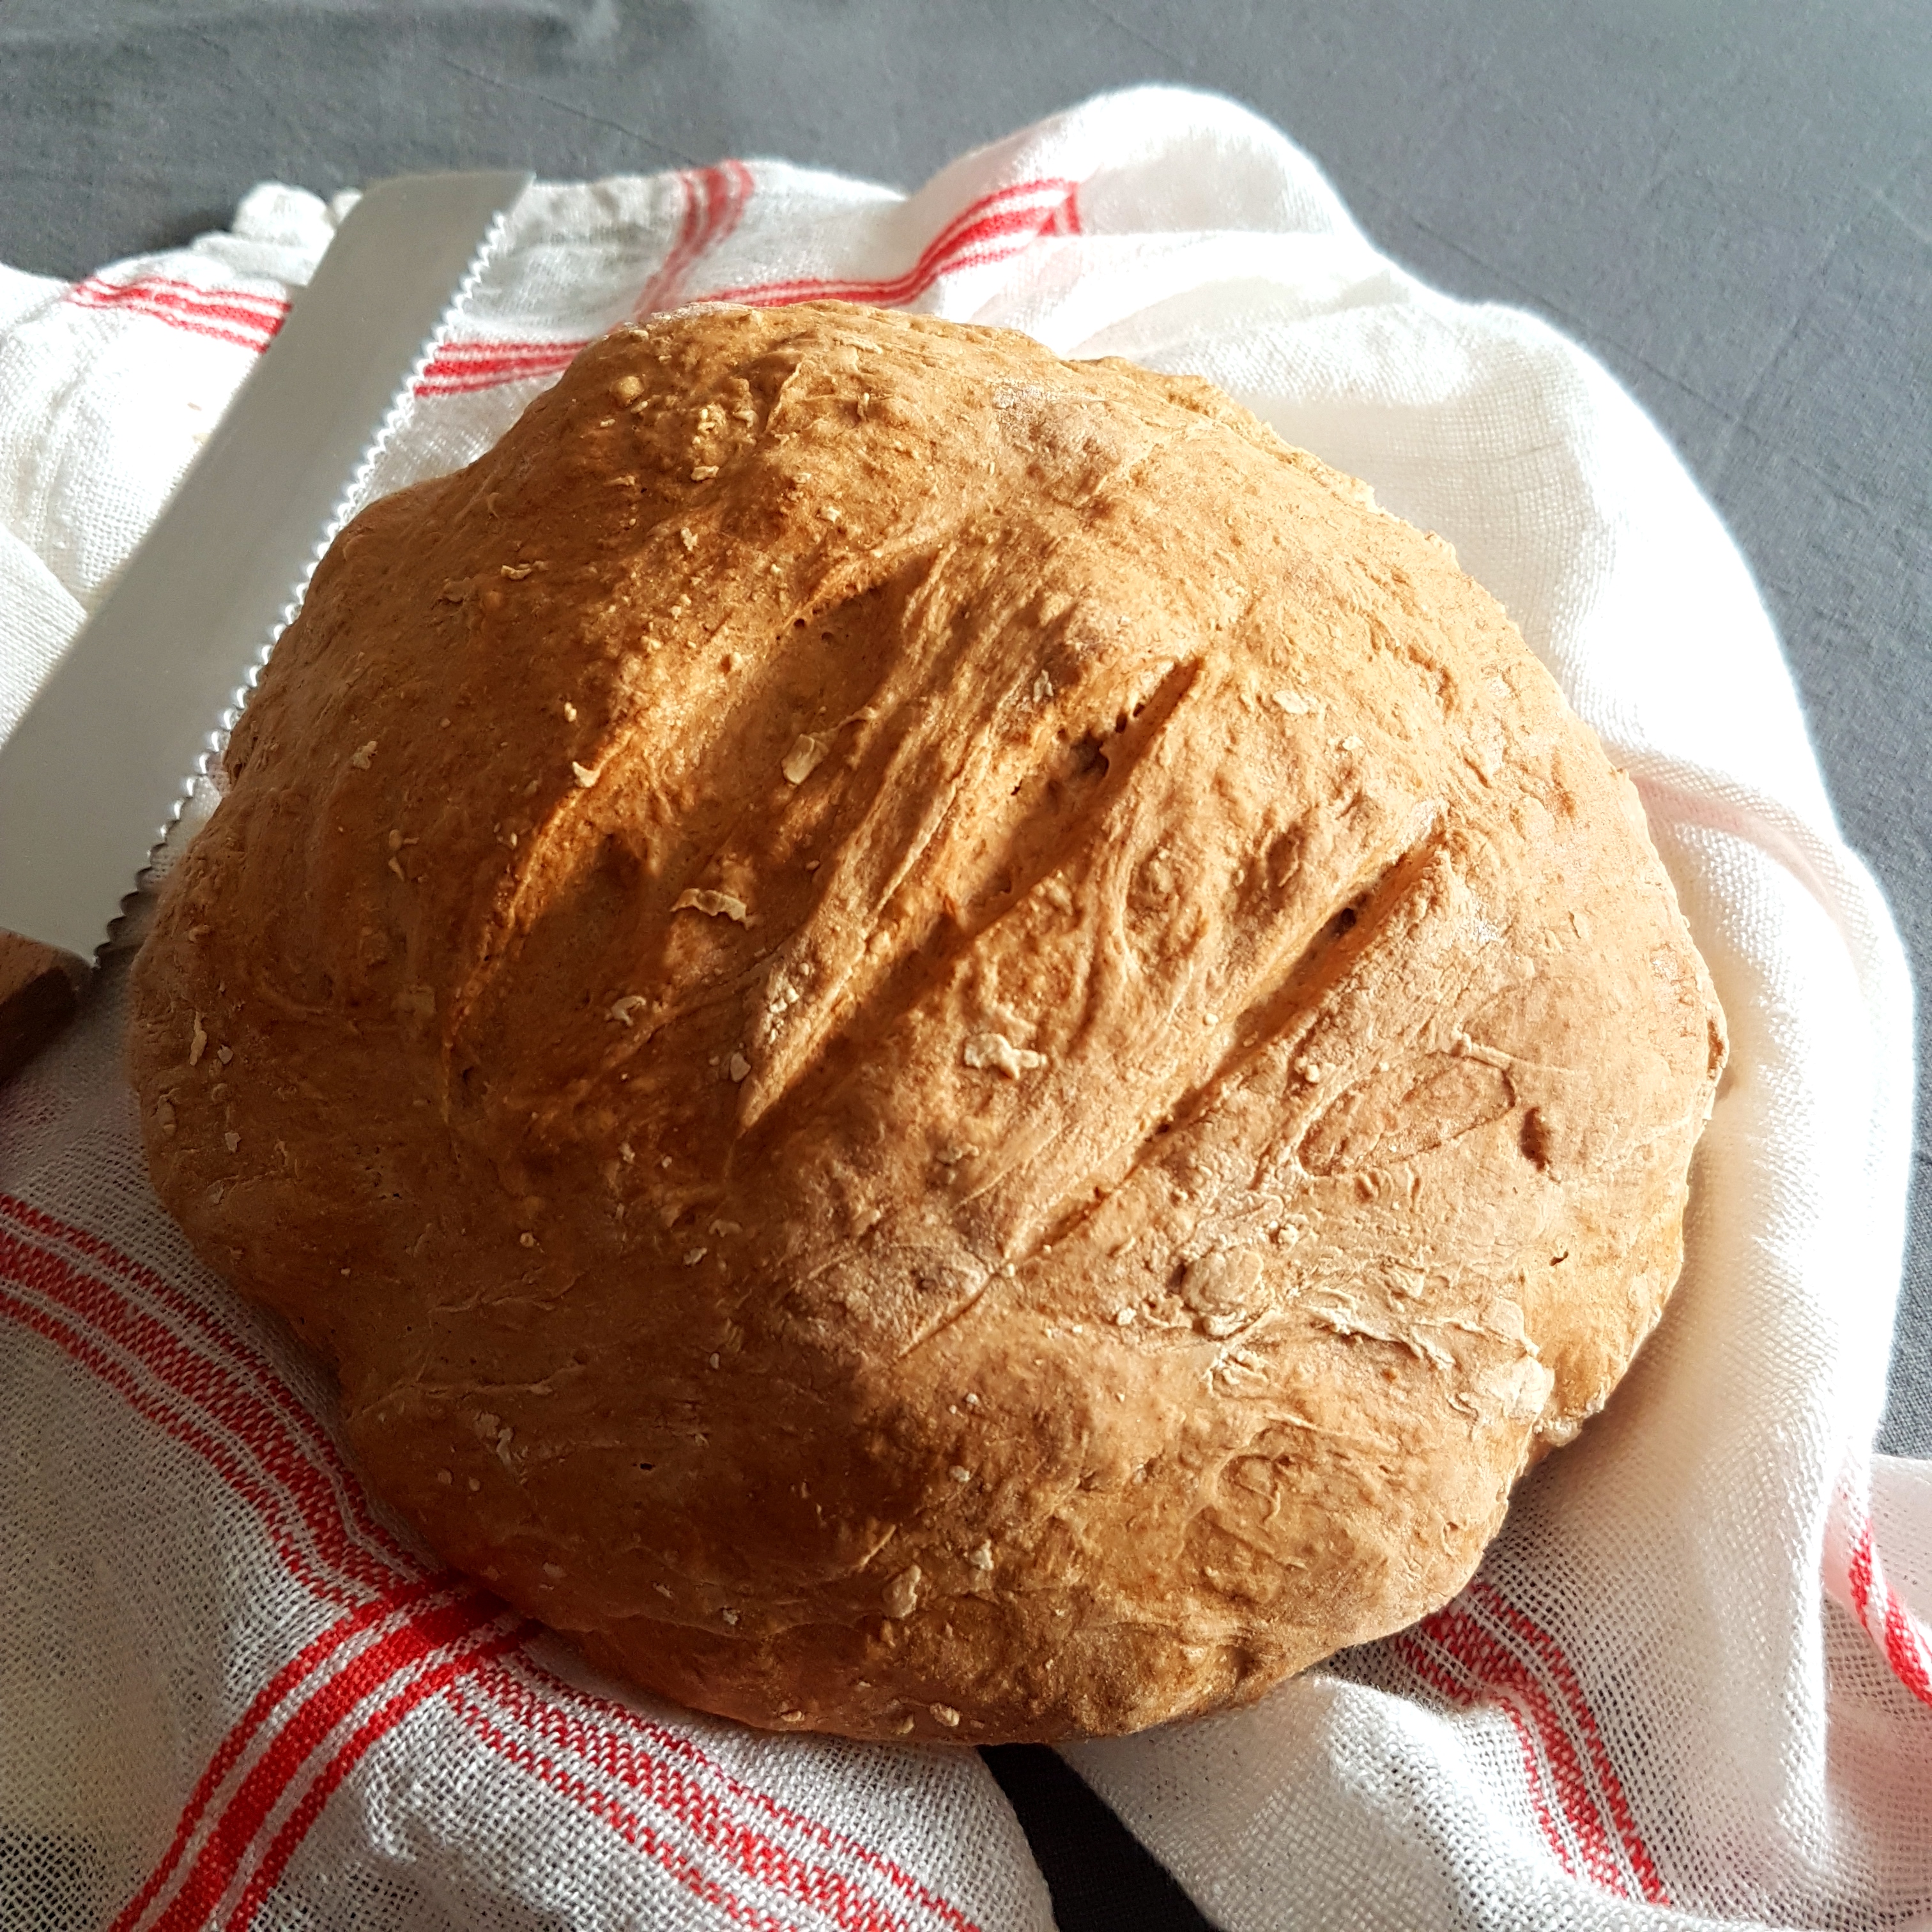
This Gluten free and yeast free bread is nice and soft and has a lovely crispy crust.
Not only is it gluten free and yeast free, but it has one of my favourite ingredients in it….OATS!
Yes Oats, as an everyday “baked Oatmeal” eater, you can probably imagine how happy this bread makes me.
Since there’s no yeast, there is also no waiting for the bread to rise. The kneading is minimal, which I now do in the electric mixer, so while I enjoy my mid-morning coffee my bread is basically making and baking itself.

I believe the true magic ingredient in this bread to be the ground psyllium husk. It binds the bread beautifully and makes it so soft, and it has a substantial amount of beneficial fibre making it in my humble opinion the best bread ever! The original idea comes from Ela Vegan, and since reading her recipe for gluten free bread, I’ve done a fair amount of research about adding psyllium to bread recipes. And there seem to be many many people using psyllium in gluten free bread as a binder. So after testing and baking a few weeks, here is my version and we love it, simply because it’s so easy, quick, delicious and healthy.
I hope you agree, why not give it a try?


Prep time : 10 min
Cooking time : 60 min
Makes : 1 loaf

INGREDIENTS:

• 30 gr. Psyllium husk powder
• 425 ml. hand warm water
• ½ tsp. salt
• 1 tsp. regular vinegar
• 100 gr. (gluten free) Oat flour
• 150 gr. Brown rice flour
• 45 gr. White rice flour
• 45 gr. Tapioca
• 50 gr. Seeds of choice (sunflower seeds, hemp, sesame…)
• 2 tsp. Baking powder
• ½ tsp. Baking soda
• 1 egg,  beaten for brushing loaf

INSTRUCTIONS:
1. Pre heat the oven to 180 C. / 350 F.
2. In the bowl of your mixer add the water, salt and vinegar. Stir to combine and sprinkle the psyllium husk powder over the water. With the hook attachment in place, run the mixer for a minute or so until well combined. Let it sit for 10 minutes until a jelly forms.
3. In a large bowl combine the flours with baking powder, baking soda and seeds, set one tablespoon of seeds aside for sprinkling on top of the loaf. .
4. Turn the mixer on to the lowest setting and pour in the flour mixture.
5. Mix until combined. It will not turn into a normal dough ball like what you are used to, but instead remain more crumbled.
6. Transfer the dough onto a counter top that you have dusted lightly with tapioca flour, knead slightly and shape into a loaf. Brush with egg and sprinkle with the remaining seeds.
7. Place the loaf on a lined baking tin and place in the middle of the oven.
8. Bake for 60 minutes until golden on top. And when tapped with your fingers, it will sound hollow. Alternatively you may insert a wooden skewer, it should come out dry.
9. Remove from the oven once fully baked and let it cool completely before cutting.
10. This bread will keep well wrapped or in a Tupperware for a few days. You can also freeze this loaf.

Enjoy!

If you make this Gluten free and yeast free bread , be sure to leave a comment! I’d love to hear from you and if you love it, pin it. And of course, if you do make this recipe, don’t forget to tag me on Instagram! @thecookingspoonblog or hashtag it #thecookingspoonblog

Raspberry Chocolate Chunk Banana Bread

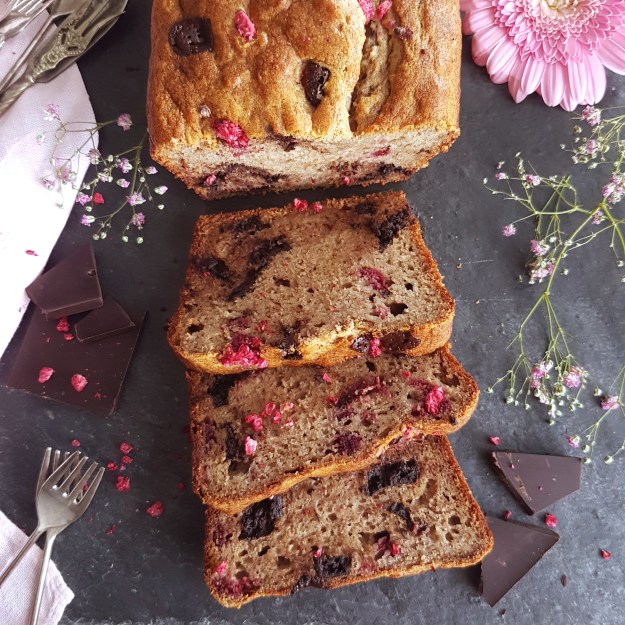
If you love Raspberries, you’re going to love this recipe. I’m a little obsessed with this bread at the moment and have been eating it every single day for the past two or three weeks, I can’t even remember, we just can’t get enough of it.

Dark chocolate chunks with sweet Raspberries are just the best combination ever. Put those two in a rich Banana bread batter and you are pretty much in Paradise.

I used freeze-dried Raspberries, because I happen to have them, but you can use fresh ones if you prefer. Frozen ones on the other hand will dye your bread pink.

I love dark chocolate, the darker the better but if you prefer a little sweeter chocolate, by all means use semi-sweet.

As for the bananas, use them very ripe, when they’re speckled with black dots.

I have used olive oil here, a very mild kind since I love the fruitiness it adds to the bread, perfect with the Raspberries.

INGREDIENTS:

  • 4 medium very ripe bananas, mashed (about 1 1/4 cup mashed)
  • 1/4 cup neutral olive oil
  • 1/4 cup Greek yogurt
  • 1/4 cup light brown sugar
  • 2 eggs
  • 3 tsp. vanilla extract
  • 1 cup whole wheat pastry flour,
  • 1 cup all-purpose flour
  • 1 tsp. baking powder
  • 1/2 tsp. baking soda
  • 1/2 tsp. ground cinnamon
  • 1/4 teaspoon salt
  • 1 cup dark chocolate chunks, or chopped chocolate
  • 1/2 cup freeze dried Raspberries or 1 cup fresh raspberries

METHOD:

Pre heat the oven to 180C/350F. Lightly oil a 9×5-inch/23x13cm loaf tin and line with baking paper.

Puree the bananas in a food processor, add the oil, yogurt, sugar, eggs and vanilla and mix until combined.

In a large bowl, mix the flours, baking powder, baking soda, cinnamon and salt.

Pour the wet ingredients over the dry ingredients and stir with a rubber spatula until combined. Stir in the chocolate chunks.

Add the (freeze-dried) Raspberries and stir until mixed thru, don’t over-mix. You want to keep the Raspberries whole.

Pour the batter into the prepared loaf pan and smooth the top with the spatula.
Bake in the middle of the oven for 50 to 60 minutes or until a wooden skewer inserted in the middle comes out dry(-ish). It is still supposed to be moist since it’s a banana bread, however there should not be any batter still sticking to the skewer.
Should the bread become too dark you can tent some foil over the top loosely.

Remove from oven once it is finished baking and let it cool on a rack for about 10 minutes, then remove from tin with the parchment paper and let cool completely before slicing.

Enjoy!