Category Archives: Baking

Baked Oatmeal pots with banana, chocolate chips and a hint of spices.

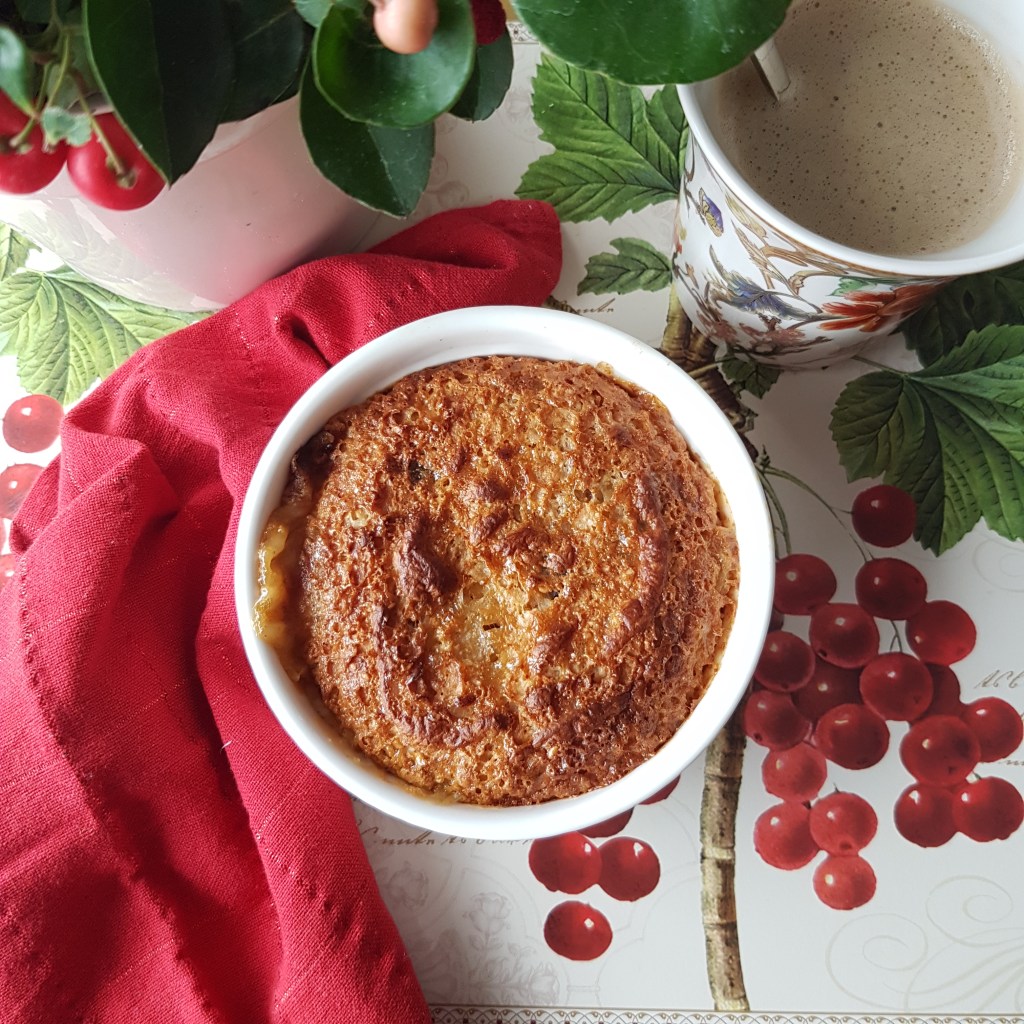
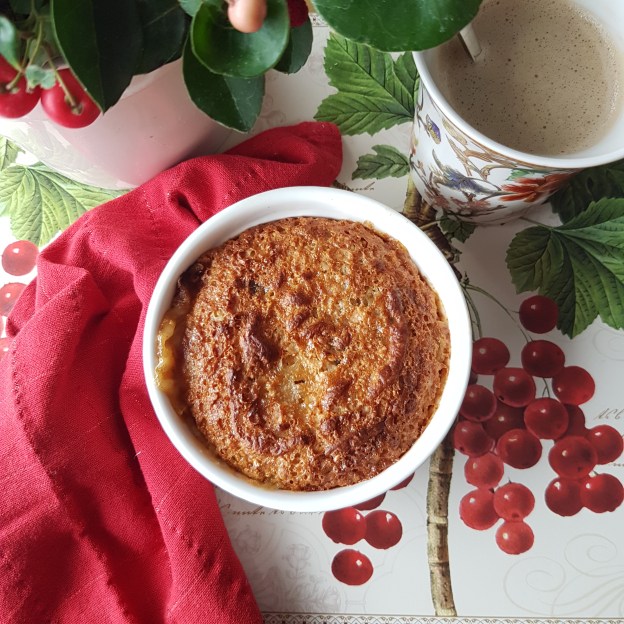
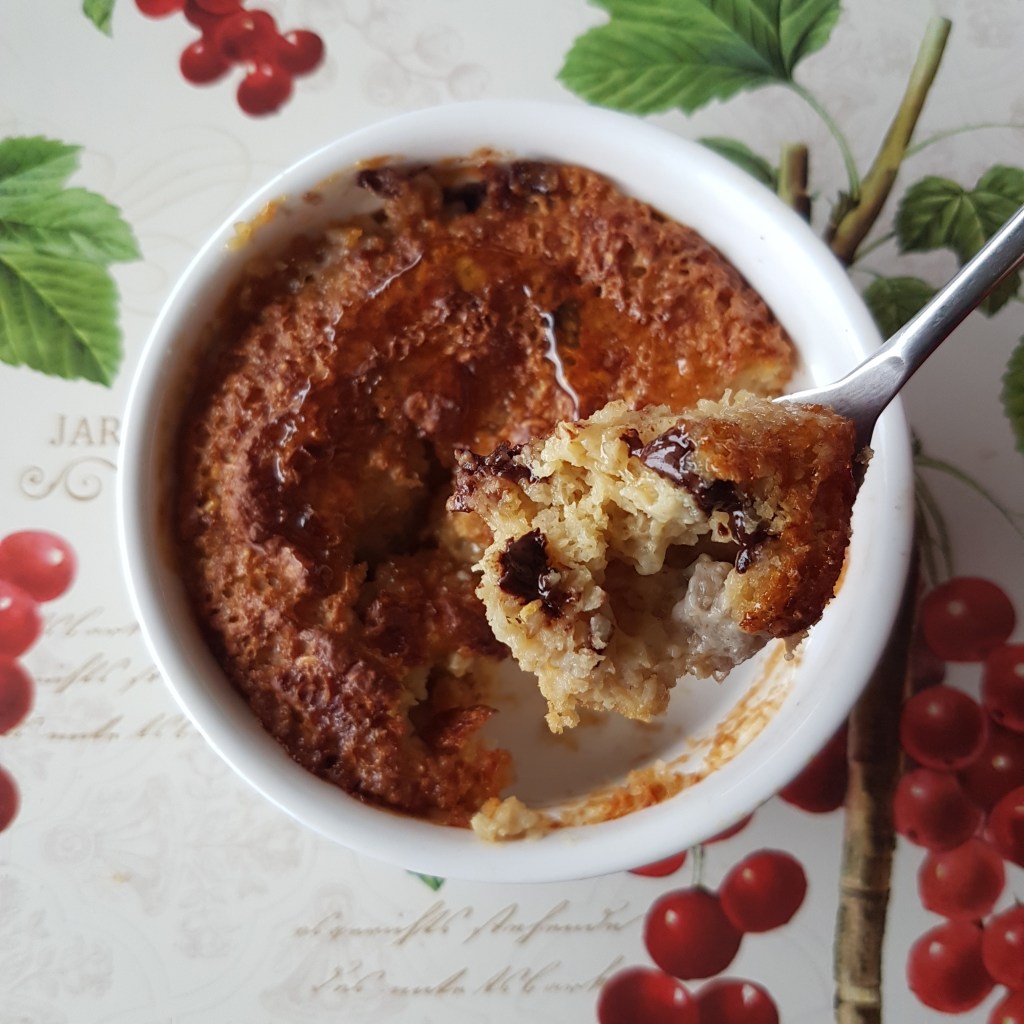
These individual Banana baked oatmeal pots are actual heaven. There is nothing like a warm breakfast now that the temperatures are dropping.

I have added  banana slices and a few chocolate chips (bc yolo) and a hint of cinnamon and cardamom to give it a warm and cozy flavour. You can completely customize these, by adding your favourite ingredients. The  little pots are topped with a drizzle of maple syrup before they go into the oven or airfryer so that the top caramelizes, it gives that creme brulee-like crispy top. You and your family will love them.

INGREDIENTS:
For ONE pot, multiply for more.
Dry ingredients;
1/4 cup oatmeal flour*
1 scoop vanilla protein powder**
1 tsp. Psyllium husk powder (optional)***
1/2 tsp. Baking powder
1/2 tsp.  Stevia (or add sweetener of choice)
1/8 tsp. Cardamom
1/4 tsp. Cinnamon
1 tbsp. Chocolate chips
Pinch of salt
Wet ingredients;
2 tbsp. Yoghurt
3 tbsp. Milk of choice
1/2 tsp. Vanilla extract
1/2 banana, peeled and sliced

INSTRUCTIONS:

Preheat airfryer to 160 °C / 320° F. or
Preheat oven to 200°/ 400 ° F

Add all the dry ingredients to a small bowl.  Mix well and add the wet ingredients. It should have a cake batter consistency, add a little extra milk if needed.
Stir to combine and add the chocolate chips and banana slices.  Gently stir one more time to distribute evenly. Place is a ramekin of about 11×5 cm / 4.5″ x 2″. Top with a drizzle of maple syrup. 

Place in airfryer for 12-14 minutes or until set and golden crispy on top.
Or you can bake these in a pre heated oven placed on the middle rack for 15 minutes. 
Remove from oven and serve straight away as is or with some thick yoghurt.
Enjoy

  • to make oatmeal flour, simply place regular dry oatmeal in a blender or food processor and blend until flour.

** I like to add extra protein, if you do not want to or do not have it, substitute for an equal amount of oatflour.

*** You can omit the psyllium husk if you do not have it, although it does give extra lift to the baked oatmeal and extra fibre.

White Velvet Cake with custard buttercream and Raspberry filling.

This is the cake of your dreams. Velvet is the perfect word to discribe this cake. It is soft and pillowy and light. The velvety smooth buttercream, rich in vanilla,  melts in your mouth and complements the cake perfectly. There is a layer of smooth raspberry jam that adds just the right amount of tang to balance it all out. Try it, you will not regret it. Perfect for any celebration.

INGREDIENTS:

For the cake:

  • 3/4 c / 170 gr. soft unsalted butter
  • 1 1/2 c. / 300 gr. granulated sugar
  • 3 c. / 300 gr. Cake flour*, spooned, leveled, and sifted
  • 3 tsp. baking powder
  • 1/2 tsp. baking soda
  • 1/4 tsp. kosher salt or (1/8 table salt)
  • 4 large egg whites, at room temperature
  • 1 tbsp. / 15 ml.  pure vanilla extract
  • 1 1/8 c. / 270 ml. whole buttermilk, at room temperature

For the velvety Buttercream:

  • 4 egg yolks
  • 1 c. / 200 gr. sugar
  • 1/2 c. / 118 ml. Water
  • 2 c. / 450 gr soft butter
  • 2 tsp / 10 ml.  vanilla extract
  • to make your own cake flour, replace per 1 cup flour, a 1/4 cup of the flour with corn starch.

For the smooth Raspberry filling:

  • 1/2 c / 100 gr. Raspberry jam
  • 1/4 c / 60 ml. Water

INSTRUCTIONS:

Cake:
Preheat oven to 350F/180C. Line 2 x 9-inch/ 22 cm. round  cake tins with parchment paper. Lightly grease pans and parchment and dust with some flour to cover all surfaces then tip out excess flour.

Beat butter and sugar with an electric mixer on low speed until combined. Increase mixer speed to medium, and beat until light and fluffy, 4 to 6 minutes, scraping the sides as needed.
Beat in egg whites, 1 at a time, beating until incorporated after each addition.
In a separate bowl combine the dry ingredients
Stir together buttermilk and vanilla in a separate jug.
Gently add in flour and buttermilk mixture into butter mixture in the bowl in three times mixing gently on the lowest setting,  after each addition, beginning and ending with the flour mixture. Scrape down the sides in between to make sure all is mixed well.

Transfer batter to prepared pans.
Bake until a toothpick inserted in center comes out clean, 25 to 30  minutes.
Cool in pans on wire racks 10 minutes; remove cakes to wire racks and cool completely.

For the velvety Buttercream:
In a bowl beat the yolks with a hand mixer until pale.
Meanwhile melt sugar in a pan with the water until sugar is completely dissolved, do not stir! You can gently swirl, as soon as it boils remove from heat. 
In a steady stream, beat syrup into yolk mixture still beating, make sure syrup does not hit the beaters or syrup will fly everywhere.
Add in the butter gradually.
Ready to frost your cake.

For the smooth Raspberry filling:
Heat jam and water in a small pan, strain thru a sieve to remove seeds. Let cool.

To assemble cake.
Place first cake layer on plate, spread with raspberry filling.
Pipe buttercream all over and smooth out with spatula.
Place second layer on top.
Frost the entire cake with the remaining butter cream. You can add a little of the raspberry jam filling to the buttercream for a pink hue or dab jam on xake to create more deeper pink in certain places. Decorate and serve.
This cake is best on the day it is made. You can freeze the cake layers before frosting but I find it impacts the texture and the cake looses the lightness.

Dutch Apple Pie

It doesn’t get anymore Dutch than Apple pie!
Apple pie is served at every occasion in the Netherlands,  it’s available in every single cafe or restaurant and also every single supermarket.  And although these are ok, nothing beats home-made Dutch Apple pie.  This recipe has been in my family for generations and my grandmother’s apple pie is legendary. This is her recipe!
It’s very simple and that is the beauty of it. The best apples are Jonagold, they hold their shape and don’t loose too much moisture, also Braeburn, Elstar or Golden delicious are great and you can also use a mix of apples which is what I usually do.

INGREDIENTS:

  • 1 egg, beaten
  • 2 1/2 cups (320g) all-purpose flour, plus extra for rolling
  • Pinch of salt
  • 1/4 cup (60gr) fine sugar
  • 16 tablespoons (2 stick, 225g) chilled unsalted butter, cut into cubes
  • 2-3 tablespoons very cold water
  • 6 large apples approximately, 
  • 1/4 cup (60gr) fine sugar
  • 1 tsp. cinnamon
  • 1 tbsp. Cornstarch
  • 1/2 tsp. Vanilla extract

INSTRUCTIONS:

To make the dough, in a food processor, combine the flour, sugar, and salt. Pulse 3 or 4 times to blend. Add the cubed butter and half of the beaten egg (the other half is for brushing over the crust) and pulse again until the mixture resembles coarse crumbs.  Sprinkle the ice water over the mixture and pulse again until it just comes together when pressed.  Transfer to a sheet of plastic wrap, divide into two and shape into two disks. Wrap tightly and chill for an hour.
Remove the dough from the fridge and let stand for 10 minutes. 
Place one part of the dough between two sheets of parchment paper and roll out to an even thick large round big enough to cover the bottom and sides of an 8 inch / 20 cm cake tin. Flour the dough as needed slightly to prevent sticking. 
Line your tin with parchment paper then carefully transfer disk to tin, if it breaks its ok, just patch it up as you go. Make sure to line the sides evenly and all the way up. Place the pie tin in the fridge while you make the filling.

Pre heat oven to 160C/320F.
Make your filling by peeling and removing the core of your apples. Then cut into pieces of about 1/2″/1.5cm. Place in bowl and add the sugar, cinnamon, vanilla and corn starch. Toss to mix and add the your pastry lined tin.
Roll out the second disk to a thickness of approximately 1/4″/0.6 cm to make the pretty lattice for the top. Cut into strips and place on apple filling to make a lattice pattern making sure to gently press the ends of the strips to the dough 8n the tin.
Brush all the visible dough with the remaining beaten egg 
Transfer to the oven and bake for one hour.
Transfer to a rack and let cool for 15 minutes.
Cut into wedges and serve as is or with whipped cream or ice cream.
Enjoy.

Almond flour chocolate Cake

This easy Almond Flour Chocolate Cake is such a showstopper! It’s incredibly easy, super tender and moist, made with almond flour and topped with the most delicious chocolate buttercream. I consider this a healthy cake because it is low carb and sugar free as well. Almonds are full of healthy fats, high in protein and have a good amount of fibre. Reason enough to get baking!

I have made this cake in a small tin so that you can bake it, just because you feel like a good dessert or because you want chocolate cake. No one’s birthday, no questions asked.

The almond flour provides a light, fluffy texture that will make you want to use it in all your baking.  I have used liquid stevia from the brand Good Good which I love.

Of course there’s also a thick layer of chocolate frosting,  otherwise what’s the point, (at least in my book). Enjoy!

Ingredients

Cake:

  • 1.5 c almond flour
  • 1/3 cup cocoa powder
  • 1 tsp. baking powder
  • 1/2 tsp. baking soda
  • 1/8 tsp. salt
  • 3 eggs at room temperature
  • 2 tsp. liquid stevia extract
  • 1/2 c. plain yoghurt (I used dairy free)
  • 1/3 c. neutral oil
  • 2 tsp. vanilla extract

Frosting

  • 3/4 c. soft butter
  • 1/2 c. cream ch
  • 1/4 c. cocoa
  • 1/2 -1 tsp. liquid stevia
  • 1 tsp. vanilla
  • 1 -2 tbsp. milk of choice

Pre heat oven at 180 C/350 F.
Line two 8″/20 cm cake tins with parchment paper,  spray with oil and dust with cocoa powder. Tap off excess.

Instructions

Start by sifting all the dry ingredients into a large bowl.
In an other bowl,  beat eggs and add yogurt, oil, vanilla and stevia.  Add the wet ingredients into the dry and stir to combine.
Pour into two tins and bake for 23 to 25 min. Test with wooden skewer by inserting into the center of the cake.  When skewer is dry, the cakes are done. Remove from oven and place on a rack to cool.

While the cakes are baking,  whip up the frosting by creaming together the butter and cream cheese until soft and smooth, add milk, stevia and vanilla and mix. Add the cocoa,  a few tablespoons at a time until fully incorporated.

Once the cakes are completely cooled,  frost the cake. You can serve straight away or first chill the cake for a few hours.  This will make cutting easier.
The cake will keep for 4 days in the fridge.