Category Archives: Food Blog

Super quick pan roast Jacket Potatoes.

IMG_9578

This is so quick and easy I almost feel embarrassed to post it. Let’s just say it’s more of a “note to self”, for future reference. I was in a big hurry to get things on the table that evening and these turned out so good that I just had to write it down. Try them, you’ll be pleasantly surprised.

Ingredients;

1 lb. medium side new Potatoes

Himalayan Salt

2 tbsp. Olive oil

Method;

Scrub the potatoes really well and dry them with kitchen paper.

Pierce them two to three times on each side and place them on kitchen paper in the microwave.

Microwave on high for three to four minutes. Turn them over and microwave for another three minutes or so. It really depends on the size of the potatoes so you will have to test them as you go. They should still be a bit firm, but you should be able to pierce them with a wooden skewer without a problem.

As soon as you can handle the heat, cut them in half lengthwise. Season with salt all over.

Heat a frying pan, add the oil and when hot add the potatoes cut side down. Fry for about 8 to 10 minutes until they are beautifully golden and crusty.

However the best flavour is obtained when you fry them in the same pan as the meat your are cooking so the potatoes get all the juicy flavor from the meat.

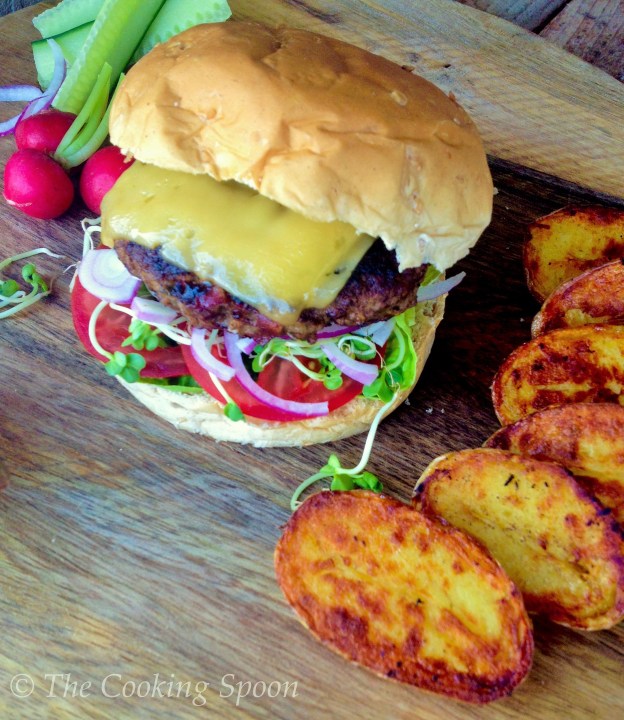
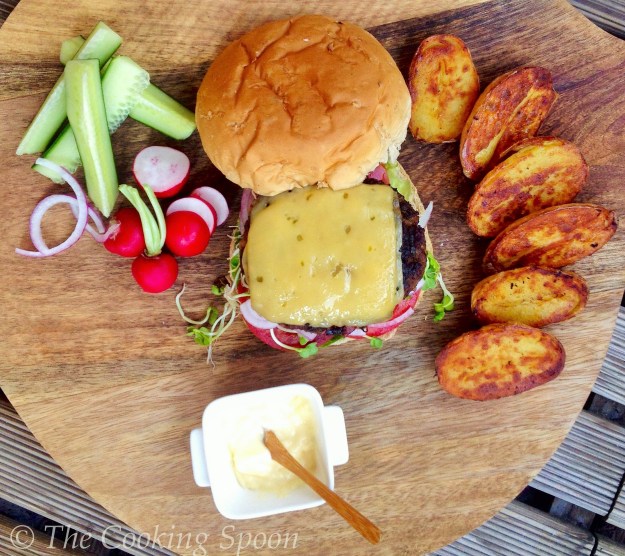
Serve straight away with a burger or anything else. Maybe a Black Bean Burger ?

Note: You can even serve these on their own as a snack with a dip or Aïoli.

IMG_9571

Deluxe Beef burger filled with Onions and Crispy Bacon, topped with Gouda

Raw Peppermint Bars

img_8050

These are a great little treat and healthy too. If you like After Eight than you are going to love these. You do have to keep them in the fridge because the Chocolate top melts very quickly. You can have these any time of day, with a cup of tea or even serve them as a dessert. No bad Cholesterol or nasty sugar in these little gems, so enjoy a Peppermint slice (or two) completely guilt free.

Ingredients Base;

  • 1 C. Dates – soaked in warm water for 10 minutes if they are very dry
  • 1 C. AlmondsIMG_8025
  • 1/2 C. Oats
  • 2 tbsp cacao
  • 1 Tbsp. Chia seeds
  • 1 – 2  Tbsp. coconut oil

Method;

To make the base, soak the dates if necessary then cut in half and remove the stones. Put all the ingredients in a food processor and pulse until you have a crumbly consistency that, when you press between two fingers should stick together. Add a drop of water if necessary.

Line a round 8″ tin with baking paper or a square tin, whatever you have at hand.

Press the base in to the tin, pressing really hard so it forms a good base. Put in the fridge while you make the Peppermint layer.

Ingredients Peppermint layer;

  • 2 C. Cashews soaked overnight, drained and dried
  • 2 tsp. Hemp powder
  • 2 tsp. Green vegetable powder
  • 1/2 C. Spinach leafs
  • 1 1/2 tsp. Peppermint extract
  • 4 tbsp. Agave
  • 2  ( or 3) tbsp. Coconut Oil

Method;

Place the cashew nuts and coconut oil in a blender and blend until smooth. You may have to stop and press the mixture down a few times. But once it gets going it will get smooth. Now add the rest of the ingredients. Taste for sweetness and add more if you like. If the mass is to solid add a little more Coconut oil. Spread this mixture over the base. Put it in the freezer so it get nice and cold for the chocolate layer. The cooler the Peppermint base the quicker the Chocolate will set.

Ingredients Chocolate layer;

  • 1/2 C. Raw Cocoa powder
  • 1/2 C. Coconut Oil, soft
  • 1/2 C. Agave

Method;

Mix all the ingredients in a bowl. Pour over the Peppermint layer and put it in the fridge until ready to serve.

Cut into squares when ready to serve and decorate with flowers or chocolate shavings.

raw peppermint bar

NOTE: I have  decorated some with green shredded Coconut. I add a teaspoon of green vegetable powder to the shredded coconut in a bowl and add a drop or two of water. Mix thoroughly and let dry before putting in a container. You can do the same for  pink Coconut shreds, using Dragon fruit powder or other fruit powders.

Enjoy!

Myra Xo

Pickled Red Cabbage

IMG_9706
Makes: 2  18 oz./500 ml.  jars
The color of this pickle is just incredible, especially after it has pickled for a few days, the color gets intensified and deeper. So pretty, but the flavor is even more amazing.
I could eat it on its own it so good. It’s very healthy too and great for digestion.
It really doesn’t take long to make and its very easy too.
It is the perfect addition to any Sandwich or Salad. Also as a side for grilled Meats or Fish.
Ingredients
    • 1 red cabbage
    • 4 tbsp.  sea salt
    • 1 1/2 C.Cider vinegar
    • 1/2 C.  Balsamic vinegar
    • 2 C.  Red Wine
    • 1 C.  Sugar
    • 1 tsp. Schezuan Pepper
    • 2 Bay leafs
    • 1 thumb sliced Ginger
    • 1/2 tsp ground All Spice
    • 1/2 tsp. ground Cloves
    • ½ teaspoon Coriander seeds
    • 2 Star Anise
    • 1 whole dried red chilli
    • 1 Orange, washed and sliced
    • 10 Cardamom pods
    • 1 cinnamon stick, broken into three pieces
    • ground Black Pepper
IMG_9689

Method;

Remove outer leaves of cabbage and cut into quarters. Remove the inner core. Finely shred the cabbage. Layer shredded cabbage in a bowl, sprinkle with salt in between layers and leave to sit on the counter for about 4 hours.

Rinse and drain the cabbage, dry with a clean tea towel.

In a small sauce pan heat vinegar, wine, spices and sugar. Bring to a boil, stirring until sugar is dissolved. Continue to boil until liquid has reduced by half.

IMG_9693

Meanwhile, turn on oven to 425° F and wash 2  18oz./500 ml. canning jars and lids with hot soapy water. To sterilize, place clean and dry jars into the hot oven for at least 20 minutes before packing.

Pack the cabbage into sterilized jars and pour over the vinegar. Seal and let cool. Keep refrigerated. Will keep for about 3 months.

Enjoy!

Myra Xo

IMG_9708

Deluxe Beef burger filled with Onions and Crispy Bacon, topped with Gouda

  • Serves 4

I have probably mentioned before that I love Hamburgers, all kinds. The thing that bothers me a little bit is that items on your burger tend to slide and move as you bite. Same goes for the Bacon, it’s always gone before the rest of the burger.

So, I came up with the idea of mixing the glazed onion and fried bacon into the burger, and it worked really well…Onion and Bacon with every single bite. Are you as thrilled as I am? It was just what I wanted.

Next time I may make a pocket in the middle of the burger for the cheese, let’s see where this goes…but for now, here’s this Deluxe Burger filled with Onion and Bacon, give it a go at your next Bbq. It’ll be a hit!

Ingredients;

  • 4 Buns, split and toasted. Store bought or home made. See  Hamburger Buns
  • 4 thick slices cured Gouda cheese
  • 1 lb. Organic Ground Beef
  • 3 oz. smoked Bacon in slices, chopped
  • 1 medium Onion, peeled and chopped fine
  • 1 Garlic clove, peeled and grated
  • 2 Sage leafs, chopped very fine, or just a pinch dried Sage
  • 1 tsp. Oregano
  • 1 tsp. Prepared Mustard
  • 2 tbsp. Worcestershire Sauce
  • 2 Egg yolks
  • 4 tbsp. dried breadcrumbs
  • 1 tsp. Himalayan Salt
  • Ground Black Pepper

IMG_9570

Method;

Put a frying pan over medium heat and add the bacon bits. Fry until crisp and golden. Remove and place on a piece of kitchen paper to drain and cool.

In the bacon fat fry the onion until golden. Turn off the heat. Let the onions cool.

In a bowl mix all the ingredients including the bacon and onion. Form into 4 patties.

Grill over high heat  Flip the Burgers after 3-4 minutes and cover with cheese. Continue to cook until desired doneness.

6-7 minutes medium/rare

8-9 minutes medium/done

9-10 minutes well done

Serve with lettuce, tomato, onion slices, sauces and condiments.

Enjoy!

Myra Xo

IMG_9576

Served with quick pan roast potatoes.