Tag Archives: Dinner

Stuffed Pork Tenderloin over creamy Polenta with Sherry gravy and crispy fried Sage leafs.

Serves  2           

This is a recipe that I have been making for years, at least 15 or so. I always make it for informal dinner parties for friends and family when you want something different but not too complicated or fancy.

To be honest with you, I don’t even remember how I came up with this recipe but I do know that guests have always loved it. It is an unusual combination of ingredients but that’s what makes it work. I guess you’ll just have to try for yourself.

You have to stuff the tenderloin first. Then you can cook the polenta and the prepared tenderloin at the same time,  since the cooking time is about the same.

IMG_0963

Ingredients Tenderloin;

1 Pork Tenderloin weighing about 12 – 14 oz

1 thin slice Serrano ham or Parma ham

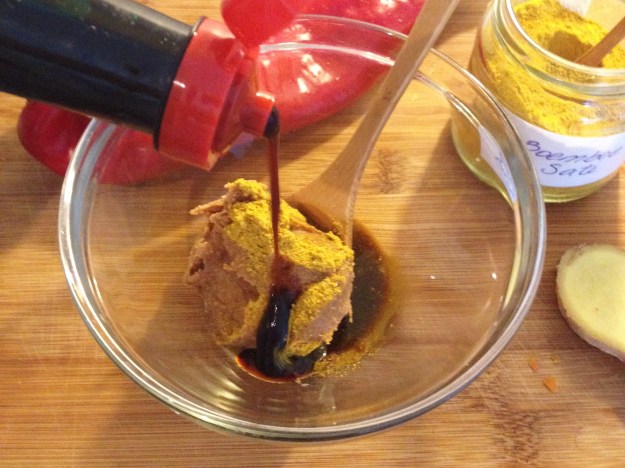
1 tbsp. Ketjap Manis

1 tbsp. Apricot Jam

1 spring onion

Salt and Pepper

1 tbsp butter

1 tbsp olive oil

1/2 glass dry Sherry

IMG_0969

Ingredients Polenta;

1 C. Polenta

2 C. milk

1 1/2 C. Chicken stock, good quality

3 tbsp. butter

1/3 C. Parmesan Cheese, grated

IMG_0960

Method;

Start by preparing the tenderloin. Lay it out on a chopping board and make a deep cut lengthwise but not all the way thru, about halfway. Open up and flatten with the palm of your hand.

In a little bowl combine the apricot preserve and the ketjap and spread all of it in the middle of the tenderloin. Cover with the ham and put the spring onion on top. Now close the tenderloin and fasten with kitchen twine.

Meanwhile bring to a boil the milk with the chicken stock. Add the polenta and stirring now and then cook for about 18 to 20 minutes. Just before the end add the butter and half the parmesan cheese. Taste the polenta and add salt and pepper (if necessary).  Reserve the other half for serving.

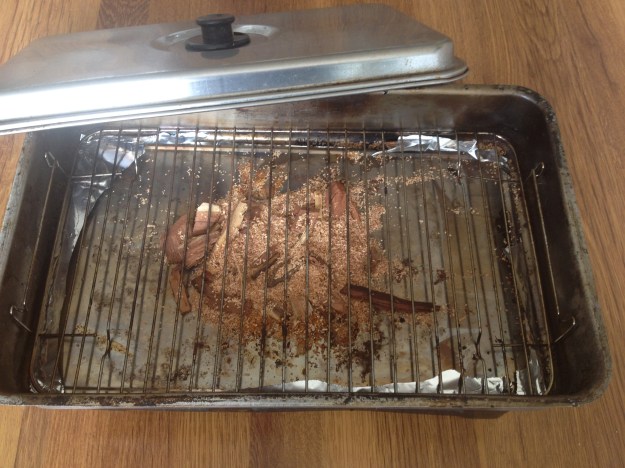
Heat a frying pan on the stove and add butter and olive oil. Cook the tenderloin, browning it all over and turning every few minutes. Give the polenta a stir now and then.

The tenderloin will take about 18 minutes, remove to  cutting board and cover loosely with tin foil. Remove the twine and slice.

Add the sherry to the pan with the meat juices and scrape to loosen  the crusty bits.

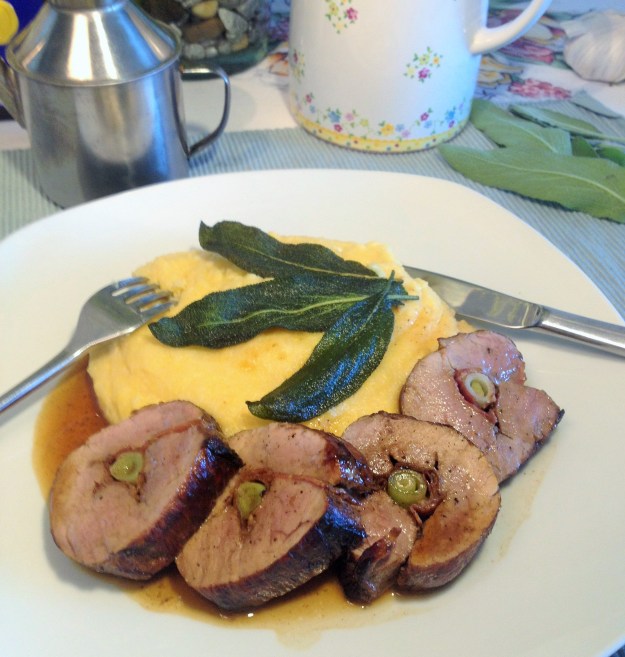
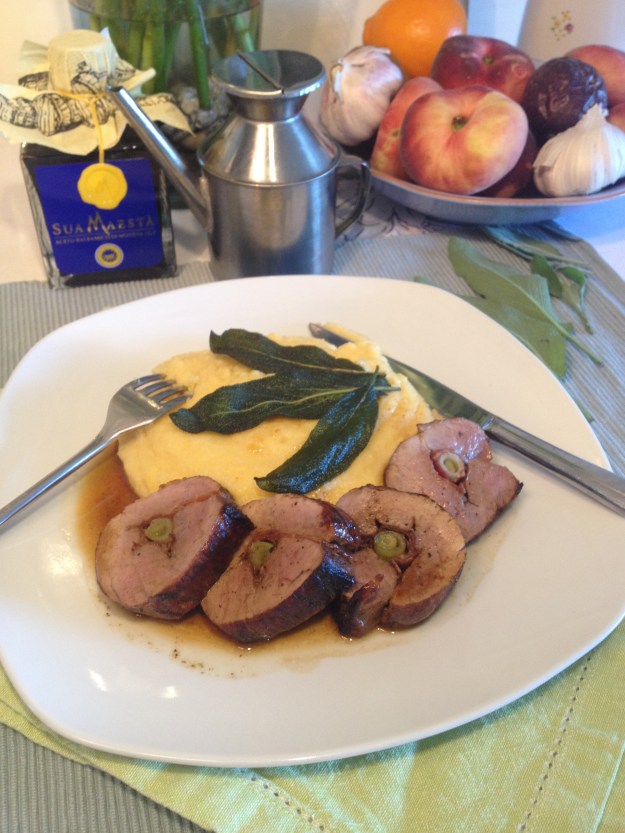
To serve, place a good amount of polenta on a plate, serve with a few slices of the tenderloin and the sherry gravy, Serve with more parmesan cheese on the side. Place a few crispy sage leafs on the polenta.

To make the crispy sage leafs, just fry them in the the pan alongside the tenderloin,frying a few leafs at a time just for two minutes or so, place them on kitchen paper until ready to use.

Enjoy

Myra Xo

IMG_0906 (2)

IMG_0958

Looking for more great recipes to try?  Be sure to check out this Pollo al Ajillo, Chicken in Garlic Sauce .

Nasi Goreng, my way

IMG_8581
Nasi Goreng is a very popular Indonesian dish. Nasi means rice and Goreng means fried.
It can be served as a complete meal or as part of  a “Rijsttafel”  (Rice table).
A Rijsttafel is made up out of many different small dishes with different textures and flavors and is mostly served at special occasions.
In The Netherlands we love Indonesian food and the great thing is that you can make this dish in about half an hour. You can also serve it with  Chicken Saté (Saté Ajam)
To me this is comfort food at its best. My daughter likes to eat the rice with the prawn crackers instead of a spoon, kids…haha.
Nasi is originally a dish made with leftovers. The rice has to be cooked and cooled so it won’t stick and any leftover vegetables, meat, shrimp and ham can be added.

INGREDIENTS:

2 tbsp.  Peanut oil, also known as groundnut oil or Arachis oil

5 oz. chicken breast

1 tsp. Soy sauce

2 garlic cloves, peeled and minced

2 tsp. Sambal Oelek paste, or 1 red chili finely chopped (de-seed if you want).

½ onion, peeled and diced  small

1 small Leek, washed thoroughly and sliced thin

1 small red bell pepper, diced small

1 C. shredded cabbage (optional)

1 small carrot, peeled and roughly grated or tiny dice

4 oz. diced cooked ham

2 – 3 tsp. Boemboe Sate (see recipe  Chicken Sate )

3 tbsp. Ketjap Manis

4 C. cooked long grain rice, cooled

To serve
    • 4 fried eggs
    • 1 sliced scallion
    • Fried shallots, store bought
    • Cucumber slices or sticks
    • Krupuk (prawn crackers)
    • Seroendeng (fried dried coconut and peanuts, spiced)
    • Sate sauce and chicken sate (optional)

Method:

First thing to do is to cut the chicken in small dice and marinate in 1 tbsp. of Ketjap Manis and 1 tsp. of Soy sauce while you are preparing the rest of the ingredients.

Now heat 1 tbsp. of the oil in a large skillet or wok over medium high heat and cook garlic and chili until fragrant, remove to a plate.

Add a little more oil to the wok and add the chicken. Cook until brown and cooked through. Remove from skillet and transfer to the plate with the garlic and chili.

Add the onion to the wok. Cook  until translucent. Turn the heat to high.

Add the rest of the vegetables, the ham and the boemboe Sate. Return the chicken, garlic and chili to the wok as well.

Add rice and fry, breaking up the rice then add the sambal and more Ketjap Manis

Transfer rice to a serving platter. Sprinkle with scallions.

Fry the eggs, sunny side up, or to your liking.

Serve the rice with a fried egg on top and add garnishes.

IMG_8575

IMG_8606

Potato Focaccia

IMG_8710

Makes 2 large Focaccias or 6 – 8 small ones

Pre heat the oven to 425° F

Spoiler alert!!

There’s mashed potatoes in the dough.

If you think your love for all things “Dough” can’t grow bigger…you’re wrong.

Unless you have already had a potato Focaccia before. This is the lightest and fluffiest Focaccia you will ever have. When you press the Focaccia between your fingers you will see there is a bounciness that is unmatched by anything else. The mashed potato does something magical to dough.

I’ve had it in cakes before too and the same thing happens.

But back to the recipe, you will need to plan ahead, because it has to rise for quit some time. You can use left over cold mashed potato or otherwise just boil a few potatoes and mash them. This recipes makes a lot, but you can easily freeze some of the dough for later use.

IMG_8699

The Focaccia above has home roasted Tomato sauce, grilled Onions, grilled Peppers and a few Anchovis on top. You can leave out the Anchovis for Vegans.

Ingredients:

1.5 C. Luke warm water, about 100° F

2 tsp. instant yeast

1 tsp. Honey or Sugar (for vegans)

6 C. Spelt flour

1/4 C. olive oil

1.5 tsp. Himalayan Salt

1 C. Mashed potatoes.

Method:

Put the warm water in the bowl of your mixer, fitted with the hook attachment. Pour in the honey, or sugar. Add the yeast, carefully mix and leave it to activate for about ten minutes.

Meanwhile measure out all your other ingredients.

Mix the olive oil in with the mashed potatoes and add to the bowl. Mix gently. Add the remaining ingredients and mix on medium for about 5 minutes. The dough should not cling to the bowl anymore, add a little flour if it does.

Turn out to a lightly floured surface and give it a knead and shape into a ball and place in an oiled bowl. Cover with oiled cling film and leave to rise for 3 hours.

After the rise. Turn out the dough to a floured surface. Divide in half. Shape one half into a Focaccia shape, I always make mine a little oval shape and also a bit irregular to give it a more rustic look.

Place the Focaccia on a baking tray lined with parchment paper. Press little dimples in the dough with your finger and drizzle  with some olive oil and sprinkle with some coarse sea salt and Rosemary.  Drizzle the Rosemary with a little bit of oil before to prevent burning.

Place in the oven and bake for about 25 minutes. After 15 minutes turn the heat down to 400° F. It should sound hollow when you tap on it.

Alternatively, make smaller shapes and bake about 5 minutes less.

You can also top your Focaccia with vegetables, or anything else you like. This way becoming a meal in itself.

When I bake smaller plain ones I  use them for sandwiches. Or serve them with soup. The large ones are great party food cut into smaller squares, or serves two as a dinner with plenty of toppings. Basically once you have the dough let your imagination run free.

Enjoy

Myra Xo

IMG_8715

Home smoked Salmon

IMG_8641

Serves 4

Smoking Salmon at home has got be one of most satisfying cooking experiences I can think of. It’s very rewarding, quite effortless and very impressive.

Because of the high fat content of the fish,  it holds up really well against the smoking, it doesn’t dry out at all. The skin becomes it bit leather like and the inside  pink and very  juicy.

The fun part is, that is actually really easy.  IMG_8648

Ingredients;

  • 4 portions of Salmon, or one large piece for four portions
  • 1 C.  Coconut blossom sugar or regular sugar, use half white and half brown
  • 1/3 cups kosher salt
  • 3 torn up Bay leafs
  • 2 tablespoons crushed black pepper

IMG_8644

Method;

Mix the Sugar, Salt, Bay leafs and Pepper

Get out a ceramic or glass baking dish and put in half the seasoning, lay your Salmon on top and cover with the remaining seasoning. Cover tightly with cling film and refrigerate from 4-8 hours. 8 is best.

After this time, remove fish from the dish and rinse thoroughly with cold water. Pat dry with kitchen paper and let dry in the fridge uncovered for about three hours. This will form a skin. Essential for a good result.

Meanwhile prepare your smoker according to the manufacturers instructions.

IMG_8634

Put about three tablespoons of wood shavings on the bottom tray of your smoker. I like to add some flavoured chips like Hickory or Maple. Put the second rack on top. Now place each piece of Salmon on a lightly oiled piece of aluminium foil, and put them on the top rack of your smoker. Salmon will stick to the rack, so the foil is a must. Put the lid on. Set the flames to medium for the first five minutes to get it going then turn to low and cook for about 20 to 30 minutes. Check after 20 minutes by gently pulling a bit of Salmon away with a fork.

When its’ done remove from smoker and serve. Left overs are incredible but unlikely.

Enjoy

Myra Xo

IMG_8653