Category Archives: Baking

Oreo Cheesecake

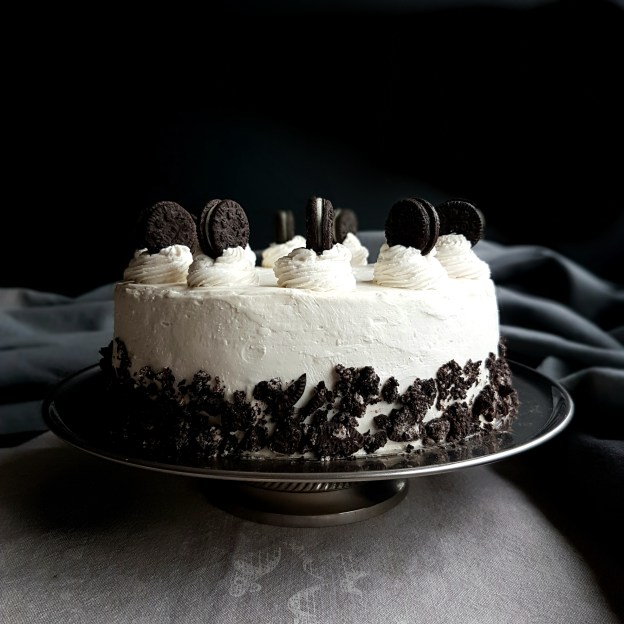
This cheesecake is such a show stopper! Creamy like youโ€™ve never tasted before. Filled with Oreo cookies on an Oreo cookie base and the wonderful thing about this recipe is that itโ€™s quite straight forward, for the crust you just crush the Oreo cookies with filling and all, add a little melted butter and done.
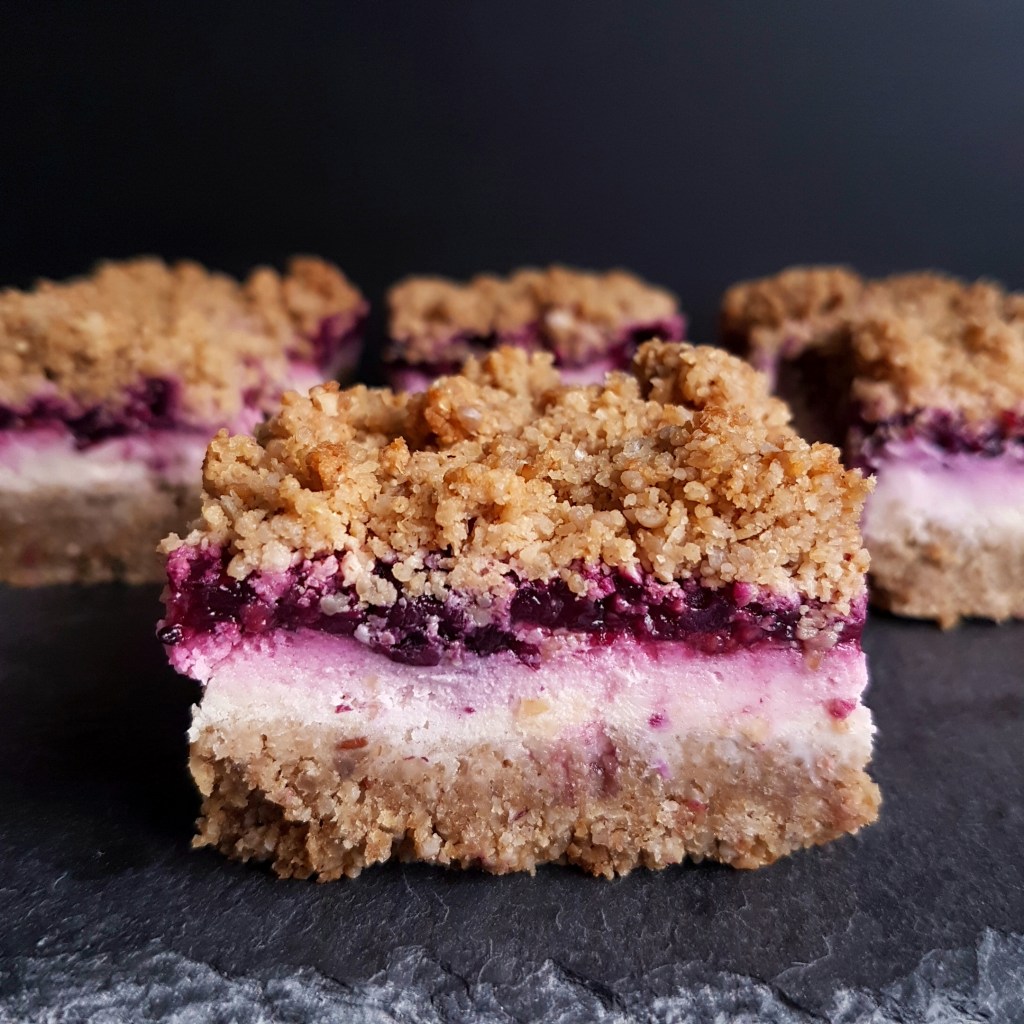
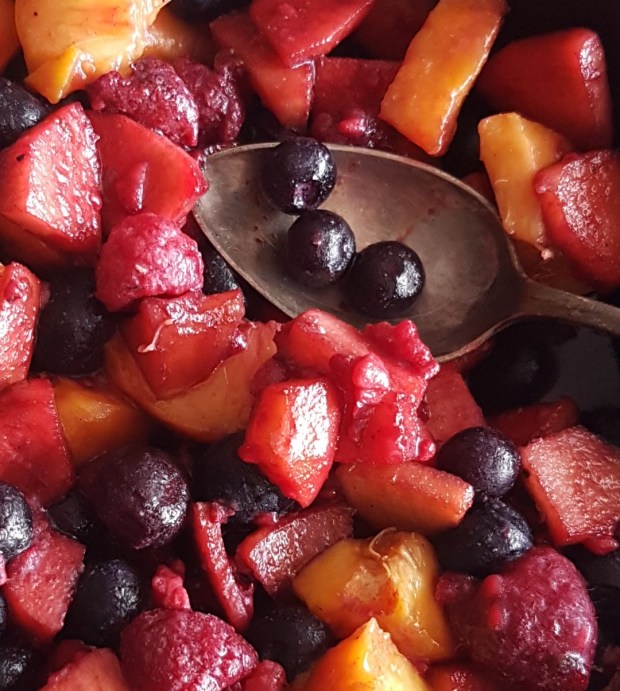
The filling is really simple too, so creamy and hands down my favourite cheesecake recipe. Unless you donโ€™t want to bake in which case youโ€™d probably be better off with something like this no-bake white chocolate cheesecake with Raspberry swirl , or if you just need a small cheesecake fix you can make these Berry Cheesecake crumble bars instead.
Either way, this cheesecake is thick, rich and dangerously decadent and a must try!

Prep time : 20 min

Baking time : 45-50 min


INGREDIENTS:

โ€ข 250 grs / 9 oz / about 22 cookies for crust
โ€ข 8 cookies for filling, quartered or roughly chopped
โ€ข 3 tbsp. melted butter
โ€ข 850 gr. / 3 ยพ cups cream cheese at room temperature
โ€ข 1 cup sugar
โ€ข 2 teaspoon vanilla
โ€ข 1 tbsp. all purpose flour
โ€ข 3 large eggs plus 1 yolk at room temperature

INSTRUCTIONS:

1. Heat oven to 350 F / 180 C. Place the cookies for the crust in a resealable plastic bag. Flatten bag to remove excess air, then seal bag. Finely crush cookies by rolling a rolling pin across the bag. Alternatively crush cookies in a food processor by pulsing until completely crumbled. Place in a bowl and add the melted butter, mix well. Press firmly onto bottom of 8 inch/ 20 cm. non-stick spring form pan. Place in the freezer while you make your filling.
2. Beat cream cheese, flour, sugar and vanilla in large bowl with electric mixer on medium speed until well blended. Add eggs, 1 at a time, beating until blended after each addition. Quarter the remaining 8 cookies. Gently stir into cream cheese batter. Pour over prepared crust.
3. Place on a rack in the middle of the oven and bake at 350 F/180 C for the first 20 minutes, then lower the temperature to 320 F / 160 C. Bake for 45 to 50 minutes or until center is almost set. Turn off the oven and open the door just a tiny bit (I put a large wooden spoon in the opening or a folded tea towel), leave the cheesecake in the oven for another hour. This will prevent the cheesecake from cracking*. Cool at room temperature until no longer warm to the touch. Then refrigerate for at least four hours but preferably overnight.
4. When ready to serve, decorate with whipped cream and tiny Oreo cookies if desired. I like to remove the cheesecake one hour before consuming so the cheesecake isnโ€™t too cold.

*the trick to a perfect cheesecake is to NOT remove it from the oven straight after baking, and donโ€™t open the oven door during baking either. This will make it crack. If that does happen any way, itโ€™s not the end of the world, just sprinkle with crushed cookies, or decorate with fruit, Gananche or whipped cream.

Enjoy!
Myra XO

oreocheesecake

berry cheesecake crumble

Berry Cheesecake Crumble Bars

Berry Cheesecake Crumble Bars

These Berry cheesecake crumble bars are an amazing treat. They combine all the things I love in one. Cheesecake being number 1, crumble…because who doesn’t love crumble and obviously the cookie like bottom. And then the layer of juicy fruit. Which of course you can adapt to your favourite fruit.

They are super easy to make and a real crowd pleaser too.

______________________________________________________________________________

INGREDIENTS:

  • 1 cup cashew nuts
  • 3 cups oats
  • pinch of salt
  • 1/2 cup natural oil or butter
  • 1/2 cup plain sugar or coconut blossom sugar

  • 2 packages (8 oz each) cream cheese, softened and at room temperature
  • 1/2 cup sugar
  • 2 tablespoons all-purpose or spelt flour
  • 1 teaspoon vanilla extract
  • 1 large egg at room temperature

————————————————————-

  • 2 cups frozen berries of choice
  • 2 tbsp. corn starch dissolved in two tbsp. water
  • 2 tbsp. sugar (or more to taste)

INSTRUCTIONS

  1. Preheat the oven to 180ยฐC / 350ยฐF . Line an 8-inch baking tray with parchment paper.
  2. In a food processor, combine the nuts, oats, and salt and process until you have a coarse flour. Leave it in the processor.
  3. In a small pot, melt the oil or butter with the sugar over low heat, until the sugar has dissolved.
  4. Pour the wet mixture on top of the oat mixture in the food processor and process until the mixture comes together.
  5. Set aside 1 cup of the crumble mixture for the topping.
  6. Place the remaining oat mixture over the base of the baking tray and push down with your (slightly wet) fingers. Press the dough down tightly. 
  7. Pre bake the crust for 5 minutes. Remove from the oven and let cool for 5 minutes.
  8. Meanwhile make the fruit layer by placing the berries in a saucepan and bring to a slow boil over medium heat. Add the corn starch slurry and sugar and cook until thickened. Don’t stir to vigorously , try to leave some berries whole.
  9. Let cool slightly.
  10. Meanwhile, in large bowl, beat cream cheese, sugar, flour, vanilla and egg with electric mixer on medium speed until smooth.
  11. Spread all the cream cheese mixture over the oat base
  12. Spread the slightly cooled fruit in an even layer over the cream cheese.
  13. Crumble the reserved cup of oat mixture evenly over the fruit.
  14. Bake, uncovered, for 25 minutes more, until the topping is lightly golden and firm. Let cool in the pan on a cooling rack for at least an hour, then transfer the pan to the fridge until completely cool and firm (preferably over night). If you can’t wait, put the slightly cooled tray into the freezer for about 30 to 40 minutes. Lift out and slice into squares. Store in an airtight container in the fridge. They freeze well too. 

Enjoy!

Myra XO

Peach and Berry Crumble

Since it is pretty much Fall here… yes, this soon. I’m thinking we can all use a little extra comfort.
In the form and shape of crumble, lots of clumpy crunchy comforting lumps of cookie flavoured morsels covering juicy peaches and berries.
To me that is comfort at it’s best.
You can serve it either warm or let it cool and serve it with whipped cream or even ice cream.

It’s simply one of our favourite desserts and we make it all the time with all kinds of fruit, depending on the season, but this particular combo has me running back for more each time, not to mention the cookie like smell coming from the oven during baking.
I actually also love to have this in the morning,  if there are any leftovers and serve it with a dollop of Greek yoghurt. I mean it’s healthy right? Fruit, fibre, yes, I think so.

INGREDIENTS:

Fruit mixture:

  • 2 cups of fresh or frozen berries and/or blueberries
  • 2 -3ย  roughly chopped fresh peaches, (skin removed)
  • 2 tablespoons honey
  • 1/2 tsp. vanilla extract
  • 1 tablespoon flour

Crumble Layer:

  • 1 1/4 cup rolled oats
  • 1 cup (spelt) flour
  • 1/2 teaspoon baking powder
  • 1/4 cup almonds, roughly chopped
  • pinch of cinnamon
  • pinch of salt
  • 6 tablespoons almond butter, soft
  • 6 tablespoons cold butter, cut into small piece (or grated)
  • 1/2 cup maple syrup or light brown sugar

Extra:
1 tbsp of butter for pan or baking dish
whipped cream to serve

INSTRUCTIONS

1. Preheat the oven to 350 F / 175 C .

2. Butter a 10-12 inch skillet or a similar baking dish and set a side. This step just adds flavor.

3. Peel the peaches (as best as you can) and remove the stone, cut them into bite size pieces and place them in the skillet.

4. Add the honey and vanilla and stir to combine.

5. Add the raspberries/blueberries and corn starch and stir carefully until all is just combined.

3. To make the topping, combine the oats, flour, cinnamon, almonds, salt and baking powder in a medium-size mixing bowl. Add the maple syrup or brown sugar. Add the butter and almond butter and use your hands to work the butter into the dry ingredients until everything is combined and lumps form. Sprinkle the topping over the fruit.

4. Transfer to the oven and bake for 40 minutes or until the top is golden and bubbling. Remove from the oven and let cool slightly. Serve warm or at room temperature with whipped cream. Enjoy!

XO

Myra

Cinnamon Swirl Banana Bread

Cinnamon Swirl Banana Bread

The smell coming from the oven while this cinnamon swirl banana bread was baking was simply amazing.

This banana bread, with itโ€™s incredible moistness and sweet banana flavor has tons of very very ripe mashed bananas, this is what makes the bread so sweet and moist and generally very yummy, also yoghurt for freshness (and less butter) and a cinnamon brown sugar swirl in the middle.
Lots of vanilla in it too, because I just love real vanilla, I love it almost more that chocolate.
Making this (and from this day forward your favorite ๐Ÿ˜‰) banana bread is so simple. It’s very straight forward, however it is necessary to have all the ingredients at room temperature.
Get everything out, measure correctly and throw it together.
First mix the dry ingredients and set aside. Then in a stand mixer, mix the wet ingredients.
Mixing the dry with the wet should be done with a rubber spatula because over mixing will turn your banana bread into rubber. And that would be such a shame. Just about 8 strokes with the spatula until all the flour is absorbed. No more.


โฐ Prep time : 10 min
๐Ÿง Cooking time : 40-45 min approx.
๐Ÿด Makes : 1 loaf


INGREDIENTS:

โ€ข 2 cups (250gr.) all purpose flour or half whole wheat and have plain or even spelt flour.
โ€ข 1 teaspoon baking soda
โ€ข pinch of salt
โ€ข 1/2 teaspoon ground cinnamon
————————————–
โ€ข 3/4 cup (150gr. ) packed coconut sugar or regular light brown sugar
โ€ข 1/2 cup (115 gr.) unsalted butter, room temperature
โ€ข 2 large eggs, at room temperature
โ€ข 1 1/2 cups mashed very ripe banana (about 3 bananas)
โ€ข 1/3 cup plain yogurt
โ€ข 1 teaspoon vanilla extract
________________________
โ€ข 2 tbsp. coconut sugar or light brown sugar
โ€ข 1 teaspoon ground cinnamon

cinnamon swirl banana bread

Directions:

1. Preheat oven to 180ยฐC/350ยฐ F. Spray a 9ร—5-inch loaf pan with cooking spray. Set aside.
2. In a bowl, whisk together the flour, baking soda, salt, and cinnamon. Set aside.
3. In the bowl of an electric mixer, beat the brown sugar and butter on medium speed until well blended and creamyโ€“ about 3 minutes.
4. Add the eggs one at a time, beating well after each addition.
5. Add the mashed banana, yogurt, and vanilla. Mix on the lowest stand for just a minute or so.
6. Remove bowl from mixer.
7. Add the dry ingredients in one go and gently fold to mix with a spatula. Do not overmix. Just until all the flour is no longer visible, about 10 folds.
8. Mix the cinnamon and the sugar for the center swirl.
9. Spoon half of the batter into prepared loaf pan. Sprinkle the cinnamon-sugar in one straight line on the batter. Cover with more batter and make swirls or zig-zags with a knife.
10. Top with remaining batter. Bake for 50-55 minutes or until a wooden pick inserted in center comes out clean. Cool 15 minutes in the pan on a wire rack. Remove from pan and cool completely on the wire rack.
11. Slice and enjoy.
12. Banana Bread will keep for about a week in an airtight container.

Enjoy!
Myra XO

If you make this, don’t forget to snap a pic and post it on Instagram. Remember to tag me in your picture @thecookingspoonblog so I can see your delicious creations.