Category Archives: Dessert

Super simple Pastry Dough

Super simple Pastry Dough!


And when I say simple, I mean really simple and pretty much fool proof and no fail. This flaky pastry dough keeps amazing in the fridge for a few days and also in the freezer for about a month. We always have some in the freezer.
Sometimes I prepare various tins filled with dough, pop them in the freezer so I can make a pie or mini tarts at a moments notice.
What I love about this recipe is that you can use it for both sweet or savoury pies.
The most important thing with pastry is that it has to be, and stay as cold as possible at all times until it goes into the oven. When using ice water use as little as possible, a high fat content is essential in the butter you use, 80% preferably. Cut the butter in small cubes and place it in the freezer for 5 minutes while you set up your food processor and get everything ready.
After that it’s five minutes work and your done.

Prep time : 10 min

Cooling time : 2 x 30 min

Cooking time : 20 min

Serves : 8

1 x 20cm/8in spring form tin or 8 small tins


INGREDIENTS:

– 200 gr / 7 oz. cold butter
– 300 gr / 10 1/2 oz all purpose flour
– a pinch of salt
– about two tablespoon of ice cold water (maybe three)

INSTRUCTIONS:

1. Fill a glas with ice cubes and add water.
2. Cut your butter into small cubes, place them in a bowl a place this in the freezer while you get out your flour and food processor.
Measure the flour and place in the bowl of the food processor. Add all the butter, divided evenly over the flour. You want to process as little as possible and as quickly as possible.
Add the pinch of salt.
Pulse the food processor a few times until the mixture resembles sand, add the ice water one tablespoon at a time. Pulse again. To test, grab some pastry between your fingers and press together, as soon as it holds , it’s ready. Tip out on to a work surface and shape into a ball. Wrap in cling film and place in the refrigerator for at least 30 minutes before shaping.
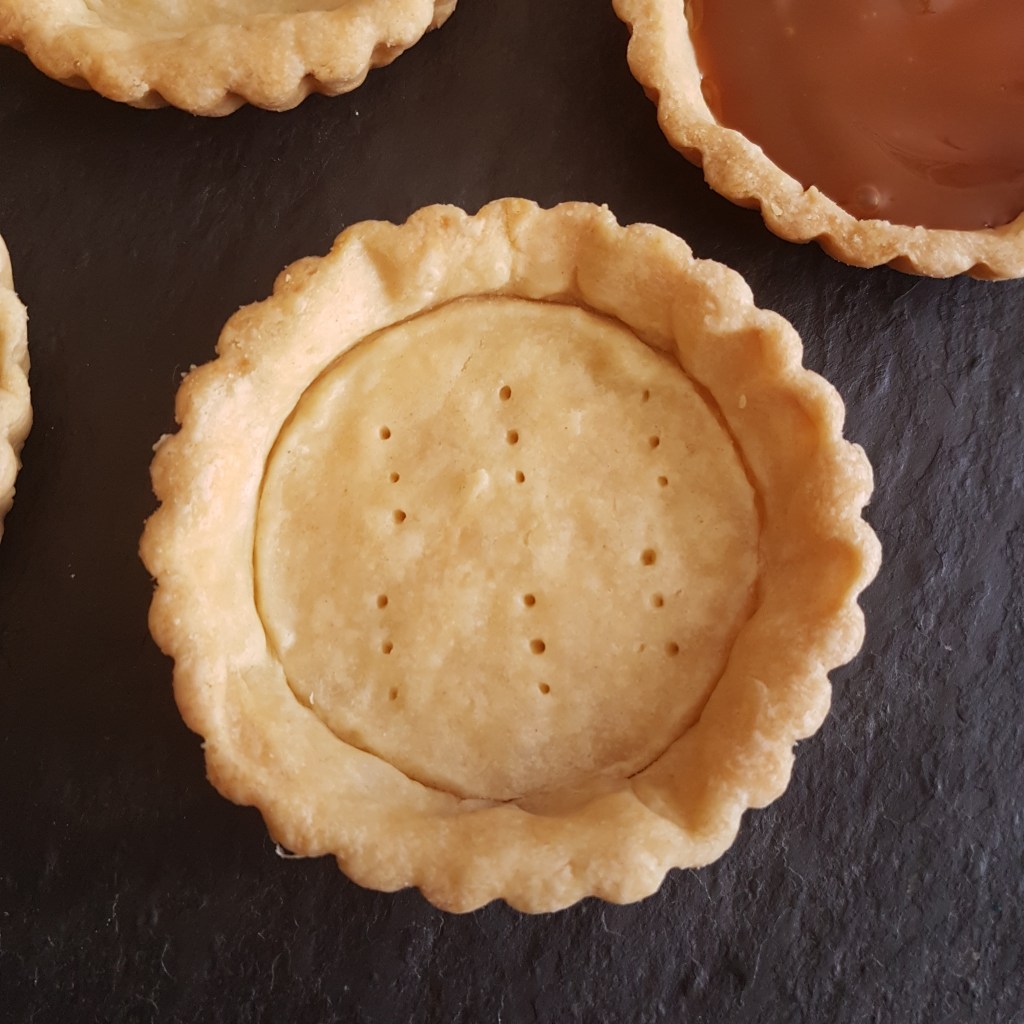
When ready to use, roll out the pastry to desired shape, place in tin that has been oiled slightly, pierce the pastry with a fork and place a piece of parchment paper on top. Add some baking beans. Return to the refrigerator for another 30 minutes to cool completely before baking.
Bake for 15 minutes, then remove the parchment paper and baking beans and bake for for 5 more minutes.
Now they are ready to be filled with your favourite filling, sweet or savoury.
Enjoy!

Cakey Sweet Potato Brownies

Let’s have a chat about these Brownies, these super soft and cakey Brownies.

They’re so unbelievably good that I don’t even know where to start. I’m not kidding either, they taste like Chocolate Birthday cake, and that’s not even my own comment. Someone actually said that while eating one of these babies. Very soft and chocolaty and pure indulgence. But…the most amazing part is that they are fat free, and I made them sugar free too. I have made them at least 9 or 10 times the past month and we just can’t get enough of them. I honestly don’t know what magic happens when you put sweet potato mash in a brownie recipe but believe me, it’s real magic.
I microwave a medium sweet potato in the morning (after piercing it with a skewer a few times) and forget about it until I am ready to bake. You could even do this the night before. For a video click here.
Then you mash the peeled sweet potato and add it to the batter, instead of butter. If you don’t want to bake with Stevia you can omit the applesauce and Stevia and substitute it for 1/4 to 1/3 cup Maple syrup or regular sugar.

INGREDIENTS:

2 eggs
1/4 cup apple sauce * see note
1/2 cup Greek yoghurt
1/2 cup mashed sweet potato
2 tsp. liquid Stevia extract * see note
2 tsp. Vanilla extract
1/2 cup all purpose flour
1 1/2 tsp baking powder
1/2 tsp baking soda
1/8 tsp. salt
6 tbsp. unsweetened cocoa
1/4 cup small chocolate chips

INSTRUCTIONS


Pre heat the oven to 180C/350F
Line a square tin 20x20cm/8″x8″ with baking parchment and oil lightly.
Pierce the medium sized sweet potato a few times with a skewer and microwave on high for about 3 minutes, turn the potato over and microwave for 2 to 3 more minutes until soft.
I always place the potato on a folded paper kitchen towel.
Let cool completely, remove the skin and mash.
In a bowl beat the two eggs, add the yoghurt, the apple sauce, stevia, vanilla and mix until combined. Add the sweet potato mash and mix well. Now add the remaining ingredients and stir to combine. You’ll notice the batter is quite thick, but spongy, this is good.
Pour batter into the prepared pan and place on a rack in the middle of the oven. Bake for about 20 minutes. Test with a wooden skewer to see if the brownies are done.
Remove from the oven and let cool completely before cutting into 9 squares.
These are best kept in the refrigerator if not eaten the same day. I have roughly calculated the calories in one square and they are about 100 calories each. Awesome right? If you make them with maple syrup or sugar they will be a bit more, but still very OK.

Enjoy!

  • NOTE: omit the applesauce and Stevia and substitute it for 1/4-1/3 cup Maple syrup.

Salted Peanut Caramel Bars

Salted Peanut Caramel Bars

This one is for all the candy bar lovers out there. Make them at home and don’t feel guilty about it, you totally deserve it. Besides, they’re pretty healthy.
With a crispy cookie-like base and heaps of gooey salted peanut-laden caramel, these bars are three layers of WOW!
Yep, three layers of WOW, that’s right! It’s a sweet-and-salty lover’s dream come true.
You need to make these at least once in your life, or twice or a hundred times, who’s judging?
I can tell you one thing, our self-control was taken to test, we had a hard time not scoffing them down all at once.

INGREDIENTS:

COOKIE BASE:
• 1/2 cup sunflower seeds
• 1 1/3 cup oats
• 1/2 cup shredded dry coconut
• 1/4 cup coconut oil, melted
CARAMEL PEANUT FILLING:
• 1/3 cup rice syrup
• 1/2 cup coconut cream (fat on the top of a can of coconut milk)
• 1 tbsp peanut butter
• 1 tsp. Vanilla extract
• A pinch of salt
• 3/4 cup lightly salted peanuts
CHOCOLATE TOPPING:
• 3.5 oz (100 gr) dark chocolate bar, chopped
• 1 tbsp coconut oil

INSTRUCTIONS:

COOKIE BASE:

1. Preheat oven to 350 degrees F. Line a 8-inch square pan with greased foil or parchment paper with overhanging sides.
2. In a food processor, combine all the ingredients for the crust and pulse until fine crumb. Test by pressing some “dough” between your thumb and index finger, when it sticks together, it’s ready for the next step. Press evenly into the bottom of the prepared pan. Prick all over with a fork
3. Bake until edges are golden and center is set, 15 minutes. Let cool completely.


CARAMEL PEANUT FILLING:

1. Add the rice syrup, coconut cream and peanut butter to a heavy bottomed pan and cook over medium-low heat for about 20 minutes, until very thick. Add the vanilla and stir. Let it cool a little bit. Sprinkle some peanuts over the cookie base, then spread the caramel evenly on top and sprinkle with more peanuts. Let it set in the freezer for 20 minutes before finishing with the chocolate layer.

CHOCOLATE TOPPING:

1. In a medium saucepan over medium low heat melt chocolate with coconut oil until smooth. Immediately poor chocolate over the top of the bars, using a spatula if needed to spread it out evenly. Chill in the fridge for about 30 minutes until filling and topping are set
2. Use overhanging foil or parchment to lift bars out the pan, and slice as desired. Bars are best stored in the fridge.


Enjoy!

Myra

More Bars to make:


Blueberry Swirl Cheesecake Ice cream


This no churn ice cream is a dream come true.

You forgot to buy ice cream? Not to worry, you can make your own without all the fancy equipment. And fairly simple too…

You just mix the basic ingredients in a bowl then place it in a plastic ziplock bag and put it in the freezer for about 4 hours, laying it out flat.
Once it’s frozen, you take it out and bang it on the kitchen counter a few times to break it up, place in a food processor fitted with blades and processed for a few minutes. You end up with the most incredible smooth ice cream, then add the blueberry swirl and the condensed milk, and voila…Blueberry Swirl Cheesecake Ice cream.


________________________________________
Prep time : 15 minutes plus freezing
Serves : 6
________________________________________

INGREDIENTS:

• 2 C. Greek Yoghurt
• 1 C. Cream cheese
• 1 tsp. vanilla
• 1/2 C.  sweetened (coconut) condensed cream, save some to drizzle on top 

• 3/4 frozen blueberries, SEE TIP
• 3 tbsp. honey or agave syrup (for the berries)

METHOD:

1. Put the greek yoghurt, the cream cheese, vanilla and condensed cream in a bowl and mix until smooth.
2. Place in a large ziplock bag and put it flat in the freezer.
3. Freeze for at least four hours or overnight.
4. Take the bag out of the freezer and bang it on the counter so it breaks into pieces.
5. Place the frozen ingredients in to the food processor fitted with the knife blades.
6. Blend until smooth for about four minutes.
7. Add a tablespoon cream or milk if necessary to get it going.
8. Meanwhile blend the frozen blueberries with the agave syrup in a blender. Add a tablespoon of water if necessary to get it going.
9. Transfer the ice cream to a container with lid, alternating spoonfuls of ice cream with drizzles of blueberry puree. Drizzle some condensed milk on top.
10. Put it in the freezer for at least 6 hours or overnight.
11. As soon as it sets cover with cling film.
12. To serve, take it out of the freezer and let it sit for about 10 minutes before scooping it out into bowls or cones.

TIP: you can take a short cut, omit blueberries and agave syrup and sub for your favourite jam.

Enjoy!

Myra XO