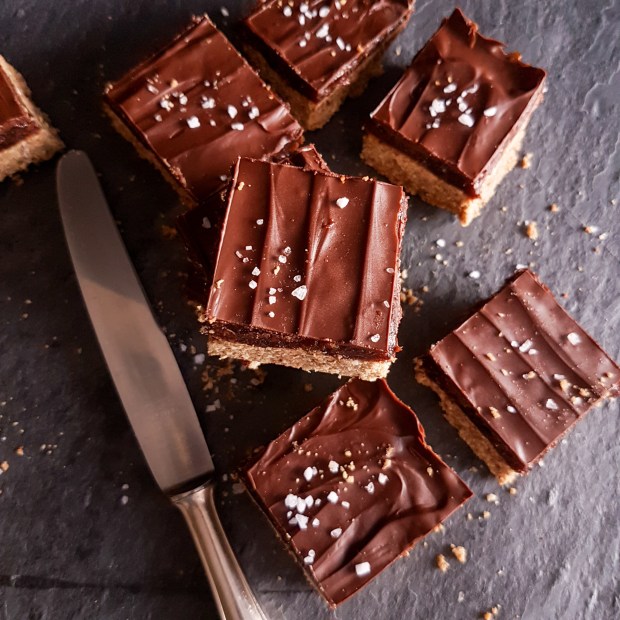
Salted Peanut Caramel Bars
This one is for all the candy bar lovers out there. Make them at home and don’t feel guilty about it, you totally deserve it. Besides, they’re pretty healthy.
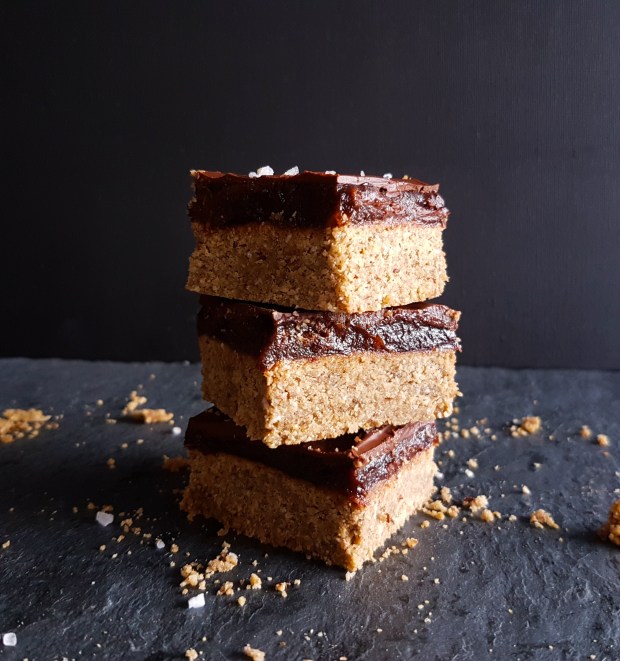
With a crispy cookie-like base and heaps of gooey salted peanut-laden caramel, these bars are three layers of WOW!
Yep, three layers of WOW, that’s right! It’s a sweet-and-salty lover’s dream come true.
You need to make these at least once in your life, or twice or a hundred times, who’s judging?
I can tell you one thing, our self-control was taken to test, we had a hard time not scoffing them down all at once.

INGREDIENTS:
COOKIE BASE:
• 1/2 cup sunflower seeds
• 1 1/3 cup oats
• 1/2 cup shredded dry coconut
• 1/4 cup coconut oil, melted
CARAMEL PEANUT FILLING:
• 1/3 cup rice syrup
• 1/2 cup coconut cream (fat on the top of a can of coconut milk)
• 1 tbsp peanut butter
• 1 tsp. Vanilla extract
• A pinch of salt
• 3/4 cup lightly salted peanuts
CHOCOLATE TOPPING:
• 3.5 oz (100 gr) dark chocolate bar, chopped
• 1 tbsp coconut oil
INSTRUCTIONS:
COOKIE BASE:
1. Preheat oven to 350 degrees F. Line a 8-inch square pan with greased foil or parchment paper with overhanging sides.
2. In a food processor, combine all the ingredients for the crust and pulse until fine crumb. Test by pressing some “dough” between your thumb and index finger, when it sticks together, it’s ready for the next step. Press evenly into the bottom of the prepared pan. Prick all over with a fork
3. Bake until edges are golden and center is set, 15 minutes. Let cool completely.


CARAMEL PEANUT FILLING:
1. Add the rice syrup, coconut cream and peanut butter to a heavy bottomed pan and cook over medium-low heat for about 20 minutes, until very thick. Add the vanilla and stir. Let it cool a little bit. Sprinkle some peanuts over the cookie base, then spread the caramel evenly on top and sprinkle with more peanuts. Let it set in the freezer for 20 minutes before finishing with the chocolate layer.
CHOCOLATE TOPPING:
1. In a medium saucepan over medium low heat melt chocolate with coconut oil until smooth. Immediately poor chocolate over the top of the bars, using a spatula if needed to spread it out evenly. Chill in the fridge for about 30 minutes until filling and topping are set
2. Use overhanging foil or parchment to lift bars out the pan, and slice as desired. Bars are best stored in the fridge.
Enjoy!
Myra
More Bars to make:
- Berry Cheesecake Crumble Bars
- Almond Cherry Chocolate Chip Granola Bars
- Macadamia-Cashew Bars with fresh berries
- Raw Peppermint Bars
- Bounty Bars